| Furnishing |
Ingredients
|
| Image |
Name |
Type
|

|

|

|

|

|

|

|

|
Style |
Other
|
|
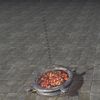
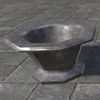
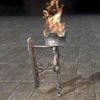
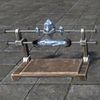
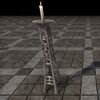
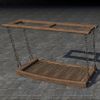
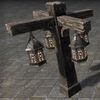
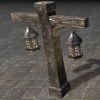
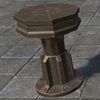
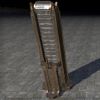
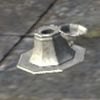
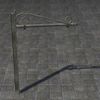
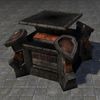
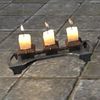
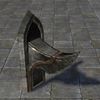
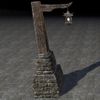
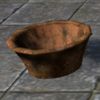
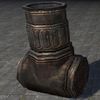
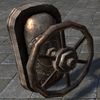
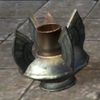
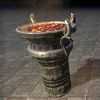
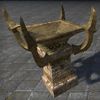
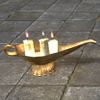
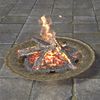
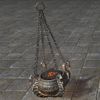
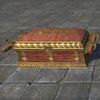
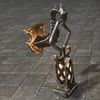
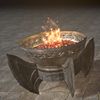
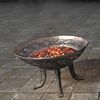
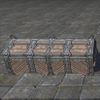
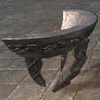
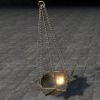
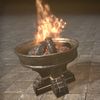
Diagram: Alinor Brazier, Hanging Coals
(Alinor Brazier, Hanging Coals)
|
Lighting
(Braziers)
|
—
|
—
|
—
|
—
|
—
|
—
|
—
|
—
|
|
|
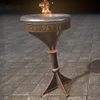
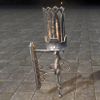
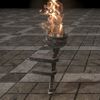
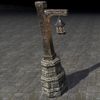
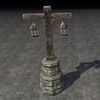
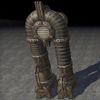
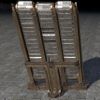
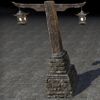
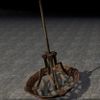
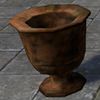
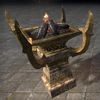
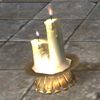
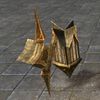
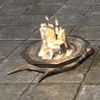
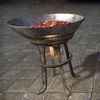
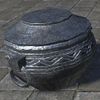
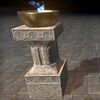
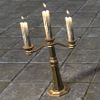
Diagram: Alinor Brazier, Noble
(Alinor Brazier, Noble)
|
Lighting
(Braziers)
|
—
|
—
|
—
|
—
|
—
|
—
|
—
|
—
|
|

|
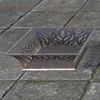
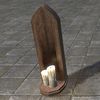
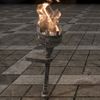
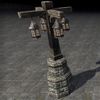
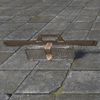
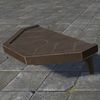
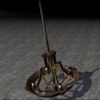
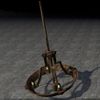
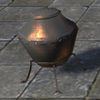
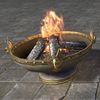
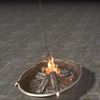
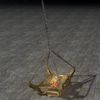
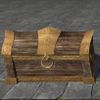
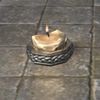
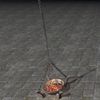
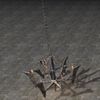
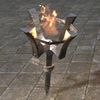
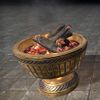
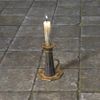
Diagram: Alinor Brazier, Standing Coals
(Alinor Brazier, Standing Coals)
|
Lighting
(Braziers)
|
—
|
—
|
—
|
—
|
—
|
—
|
—
|
—
|
|
|
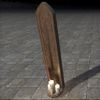
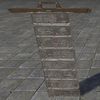
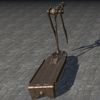
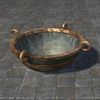
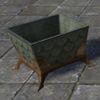
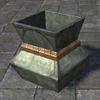
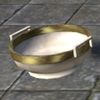
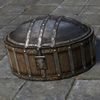
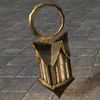
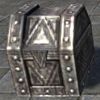
Diagram: Alinor Bread Basket, Wrought Iron
(Alinor Bread Basket, Wrought Iron)
|
Hearth
(Baskets and Bags)
|
—
|
—
|
—
|
—
|
—
|
—
|
—
|
—
|
|
|
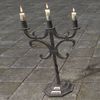
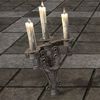
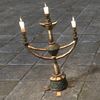
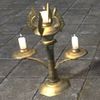
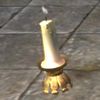
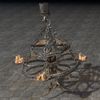
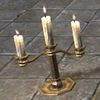
Diagram: Alinor Candelabra, Wrought Iron
(Alinor Candelabra, Wrought Iron)
|
Lighting
(Candles)
|
—
|
—
|
—
|
—
|
—
|
—
|
—
|
—
|
|
|
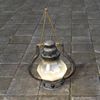
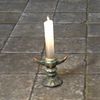
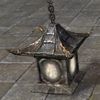
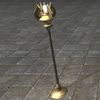
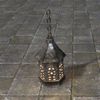
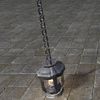
Diagram: Alinor Lantern, Hanging
(Alinor Lantern, Hanging)
|
Lighting
(Lanterns)
|
—
|
—
|
—
|
—
|
—
|
—
|
—
|
—
|
|

|
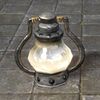
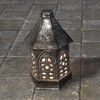
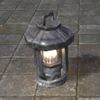
Diagram: Alinor Lantern, Stationary
(Alinor Lantern, Stationary)
|
Lighting
(Lanterns)
|
—
|
—
|
—
|
—
|
—
|
—
|
—
|
—
|
|
|
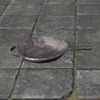
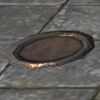
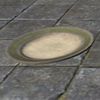
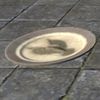
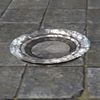
Diagram: Alinor Plate, Embossed
(Alinor Plate, Embossed)
|
Hearth
(Dishes)
|
—
|
—
|
—
|
—
|
—
|
—
|
—
|
—
|
|
|
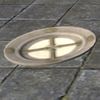
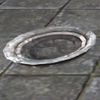
Diagram: Alinor Platter, Scalloped
(Alinor Platter, Scalloped)
|
Hearth
(Dishes)
|
—
|
—
|
—
|
—
|
—
|
—
|
—
|
—
|
|
|
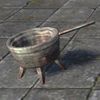
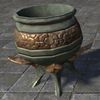
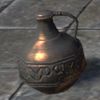
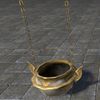
Diagram: Alinor Pot, Hanging Stamped
(Alinor Pot, Hanging Stamped)
|
Hearth
(Pottery)
|
—
|
—
|
—
|
—
|
—
|
—
|
—
|
—
|
|
|
Diagram: Alinor Pot, Patterned
(Alinor Pot, Patterned)
|
Hearth
(Pottery)
|
—
|
—
|
—
|
—
|
—
|
—
|
—
|
—
|
|
|
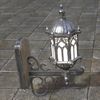
Diagram: Alinor Sconce, Arched
(Alinor Sconce, Arched)
|
Lighting
(Sconces)
|
—
|
—
|
—
|
—
|
—
|
—
|
—
|
—
|
|

|
Diagram: Alinor Sconce, Arched Glass
(Alinor Sconce, Arched Glass)
|
Lighting
(Sconces)
|
—
|
—
|
—
|
—
|
—
|
—
|
—
|
—
|
|
|
Diagram: Alinor Sconce, Candles
(Alinor Sconce, Candles)
|
Lighting
(Candles)
|
—
|
—
|
—
|
—
|
—
|
—
|
—
|
—
|
|
|
Diagram: Alinor Sconce, Candles Tall
(Alinor Sconce, Candles Tall)
|
Lighting
(Candles)
|
—
|
—
|
—
|
—
|
—
|
—
|
—
|
—
|
|
|
Diagram: Alinor Sconce, Crenellated
(Alinor Sconce, Crenellated)
|
Lighting
(Sconces)
|
—
|
—
|
—
|
—
|
—
|
—
|
—
|
—
|
|
|
Diagram: Alinor Sconce, Lantern
(Alinor Sconce, Lantern)
|
Lighting
(Sconces)
|
—
|
—
|
—
|
—
|
—
|
—
|
—
|
—
|
|
|
Diagram: Alinor Sconce, Wrought Glass
(Alinor Sconce, Wrought Glass)
|
Lighting
(Sconces)
|
—
|
—
|
—
|
—
|
—
|
—
|
—
|
—
|
|
|
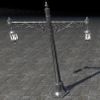
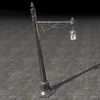
Diagram: Alinor Streetlight, Paired Wrought Iron
(Alinor Streetlight, Paired Wrought Iron)
|
Lighting
(Lightposts)
|
—
|
—
|
—
|
—
|
—
|
—
|
—
|
—
|
|
|
Diagram: Alinor Streetlight, Wrought Iron
(Alinor Streetlight, Wrought Iron)
|
Lighting
(Lightposts)
|
—
|
—
|
—
|
—
|
—
|
—
|
—
|
—
|
|
|
Diagram: Alinor Table Setting, Complete
(Alinor Table Setting, Complete)
|
Hearth
(Dishes)
|
—
|
—
|
—
|
—
|
—
|
—
|
—
|
—
|
|
|
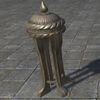
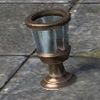
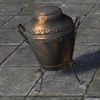
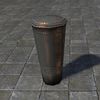
Diagram: Alinor Urn, Bronze
(Alinor Urn, Bronze)
|
Hearth
(Pottery)
|
—
|
—
|
—
|
—
|
—
|
—
|
—
|
—
|
|
|
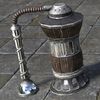
Diagram: Apparatus, Boiler
(Apparatus, Boiler)
|
Workshop
(Materials)
|
—
|
—
|
—
|
—
|
—
|
—
|
—
|
—
|
|
|
Diagram: Apparatus, Gem Calipers
(Apparatus, Gem Calipers)
|
Workshop
(Materials)
|
—
|
—
|
—
|
—
|
—
|
—
|
—
|
—
|
|
|
Diagram: Argonian Bowl, Serving
(Argonian Bowl, Serving)
|
Hearth
(Dishes)
|
—
|
—
|
—
|
—
|
—
|
—
|
—
|
—
|
|
|
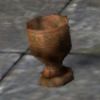
Diagram: Argonian Cup, Bordered
(Argonian Cup, Bordered)
|
Hearth
(Drinkware)
|
—
|
—
|
—
|
—
|
—
|
—
|
—
|
—
|
|
|
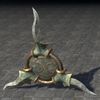
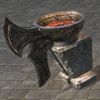
Diagram: Ayleid Brazier, Fiery
(Ayleid Brazier, Fiery)
|
Lighting
(Braziers)
|
—
|
—
|
—
|
—
|
—
|
—
|
—
|
—
|
|

|
Diagram: Ayleid Brazier, Welkynd Holder
(Ayleid Brazier, Welkynd Holder)
|
Courtyard
(Yard Ornaments)
|
—
|
—
|
—
|
—
|
—
|
—
|
—
|
—
|
|
|
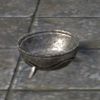
Diagram: Bowl, Serving
(Bowl, Serving)
|
Hearth
(Dishes)
|
—
|
—
|
—
|
—
|
—
|
—
|
—
|
—
|
|
|
Diagram: Breton Candelabra, Formal
(Breton Candelabra, Formal)
|
Lighting
(Candles)
|
—
|
—
|
—
|
—
|
—
|
—
|
—
|
—
|
|
|
Diagram: Breton Chandelier, Wrought Iron
(Breton Chandelier, Wrought Iron)
|
Lighting
(Chandeliers)
|
—
|
—
|
—
|
—
|
—
|
—
|
—
|
—
|
|
|
Diagram: Breton Lamp, Hanging
(Breton Lamp, Hanging)
|
Lighting
(Lamps)
|
—
|
—
|
—
|
—
|
—
|
—
|
—
|
—
|
|
|
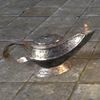
Diagram: Breton Lamp, Oil
(Breton Lamp, Oil)
|
Lighting
(Lamps)
|
—
|
—
|
—
|
—
|
—
|
—
|
—
|
—
|
|
|
Diagram: Breton Lightpost, Arched
(Breton Lightpost, Arched)
|
Lighting
(Lightposts)
|
—
|
—
|
—
|
—
|
—
|
—
|
—
|
—
|
|
|
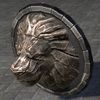
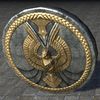
Diagram: Breton Medallion, Lion
(Breton Medallion, Lion)
|
Gallery
(Art)
|
—
|
—
|
—
|
—
|
—
|
—
|
—
|
—
|
|
|
Diagram: Breton Sconce, Floor
(Breton Sconce, Floor)
|
Lighting
(Sconces)
|
—
|
—
|
—
|
—
|
—
|
—
|
—
|
—
|
|
|
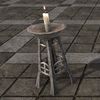
Diagram: Breton Candle, Grand
(Breton Sconce, Grand)
|
Lighting
(Candles)
|
—
|
—
|
—
|
—
|
—
|
—
|
—
|
—
|
|
|
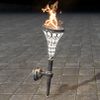
Diagram: Breton Sconce, Sturdy Torch
(Breton Sconce, Sturdy Torch)
|
Lighting
(Sconces)
|
—
|
—
|
—
|
—
|
—
|
—
|
—
|
—
|
|
|
Diagram: Breton Sconce, Torch
(Breton Sconce, Torch)
|
Lighting
(Sconces)
|
—
|
—
|
—
|
—
|
—
|
—
|
—
|
—
|
|
|
Diagram: Breton Sconce, Wall
(Breton Sconce, Wall)
|
Lighting
(Sconces)
|
—
|
—
|
—
|
—
|
—
|
—
|
—
|
—
|
|
|
Diagram: Breton Shelf, Barrel Rack
(Breton Shelf, Barrel Rack)
|
Hearth
(Stockroom)
|
—
|
—
|
—
|
—
|
—
|
—
|
—
|
—
|
|
|
Diagram: Breton Streetlight, Arched Stone
(Breton Streetlight, Arched Stone)
|
Lighting
(Lightposts)
|
—
|
—
|
—
|
—
|
—
|
—
|
—
|
—
|
|
|
Diagram: Breton Streetlight, Full
(Breton Streetlight, Full)
|
Lighting
(Lightposts)
|
—
|
—
|
—
|
—
|
—
|
—
|
—
|
—
|
|
|
Diagram: Breton Streetlight, Full Stone
(Breton Streetlight, Full Stone)
|
Lighting
(Lightposts)
|
—
|
—
|
—
|
—
|
—
|
—
|
—
|
—
|
|
|
Diagram: Breton Streetlight, Paired
(Breton Streetlight, Paired)
|
Lighting
(Lightposts)
|
—
|
—
|
—
|
—
|
—
|
—
|
—
|
—
|
|
|
Diagram: Breton Streetlight, Paired Stone
(Breton Streetlight, Paired Stone)
|
Lighting
(Lightposts)
|
—
|
—
|
—
|
—
|
—
|
—
|
—
|
—
|
|
|
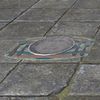
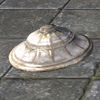
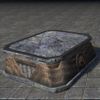
Design: Breton Urn Lid, Striated
(Breton Urn Lid, Striated)
|
Undercroft
(Urns)
|
—
|
—
|
—
|
—
|
—
|
—
|
—
|
—
|
|
|
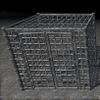
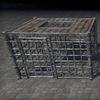
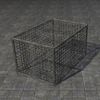
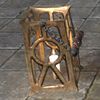
Diagram: Cage, Covered
(Cage, Covered)
|
Undercroft
(Torture)
|
—
|
—
|
—
|
—
|
—
|
—
|
—
|
—
|
|
|
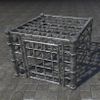
Diagram: Cage, Wild Animal
(Cage, Wild Animal)
|
Undercroft
(Torture)
|
—
|
—
|
—
|
—
|
—
|
—
|
—
|
—
|
|
|
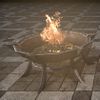
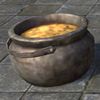
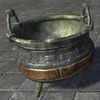
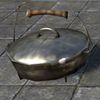
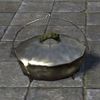
Diagram: Cauldron of Soup
(Cauldron of Soup)
|
Hearth
(Cookware)
|
—
|
—
|
—
|
—
|
—
|
—
|
—
|
—
|
|
|
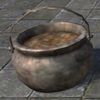
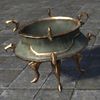
Diagram: Cauldron of Stew
(Cauldron of Stew)
|
Hearth
(Cookware)
|
—
|
—
|
—
|
—
|
—
|
—
|
—
|
—
|
|
|
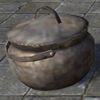
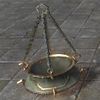
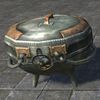
Diagram: Cauldron, Covered
(Cauldron, Covered)
|
Hearth
(Cookware)
|
—
|
—
|
—
|
—
|
—
|
—
|
—
|
—
|
|
|
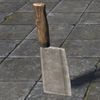
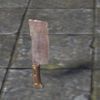
Diagram: Cleaver, Butcher's
(Cleaver, Butcher's)
|
Hearth
(Utensils)
|
—
|
—
|
—
|
—
|
—
|
—
|
—
|
—
|
|
|
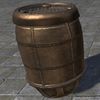
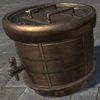
Diagram: Clockwork Barrel, Sealed
(Clockwork Barrel, Sealed)
|
Workshop
(Cargo)
|
—
|
—
|
—
|
—
|
—
|
—
|
—
|
—
|
|
|
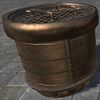
Diagram: Clockwork Barrel, Wide
(Clockwork Barrel, Wide)
|
Workshop
(Cargo)
|
—
|
—
|
—
|
—
|
—
|
—
|
—
|
—
|
|
|
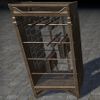
Diagram: Clockwork Cabinet, Sequence Plaque
(Clockwork Cabinet, Sequence Plaque)
|
Library
(Shelves)
|
—
|
—
|
—
|
—
|
—
|
—
|
—
|
—
|
|
|
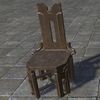
Diagram: Clockwork Chair, Practical
(Clockwork Chair, Practical)
|
Dining
(Chairs)
|
—
|
—
|
—
|
—
|
—
|
—
|
—
|
—
|
|
|
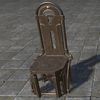
Diagram: Clockwork Chair, Reinforced
(Clockwork Chair, Reinforced)
|
Dining
(Chairs)
|
—
|
—
|
—
|
—
|
—
|
—
|
—
|
—
|
|
|
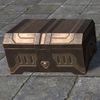
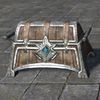
Diagram: Clockwork Coffer, Robust
(Clockwork Coffer, Robust)
|
Suite
(Trunks)
|
—
|
—
|
—
|
—
|
—
|
—
|
—
|
—
|
|
|
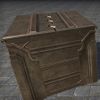
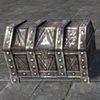
Diagram: Clockwork Crate, Large Closed
(Clockwork Crate, Large Closed)
|
Workshop
(Cargo)
|
—
|
—
|
—
|
—
|
—
|
—
|
—
|
—
|
|

|
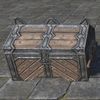
Diagram: Clockwork Crate, Large Open
(Clockwork Crate, Large Open)
|
Workshop
(Cargo)
|
—
|
—
|
—
|
—
|
—
|
—
|
—
|
—
|
|
|
Diagram: Clockwork Crate, Square
(Clockwork Crate, Square)
|
Workshop
(Cargo)
|
—
|
—
|
—
|
—
|
—
|
—
|
—
|
—
|
|
|
Diagram: Clockwork Crate, Wide
(Clockwork Crate, Wide)
|
Workshop
(Cargo)
|
—
|
—
|
—
|
—
|
—
|
—
|
—
|
—
|
|
|
Diagram: Clockwork Cup, Empty
(Clockwork Cup, Empty)
|
Hearth
(Drinkware)
|
—
|
—
|
—
|
—
|
—
|
—
|
—
|
—
|
|
|
Diagram: Clockwork Drafting Table, Flat
(Clockwork Drafting Table, Flat)
|
Library
(Desks)
|
—
|
—
|
—
|
—
|
—
|
—
|
—
|
—
|
|
|
Diagram: Clockwork Drafting Table, Raised
(Clockwork Drafting Table, Raised)
|
Library
(Desks)
|
—
|
—
|
—
|
—
|
—
|
—
|
—
|
—
|
|
|
Diagram: Clockwork Flask Stand, Short
(Clockwork Flask Stand, Short)
|
Workshop
(Tools)
|
—
|
—
|
—
|
—
|
—
|
—
|
—
|
—
|
|
|
Diagram: Clockwork Flask Stand, Tall
(Clockwork Flask Stand, Tall)
|
Workshop
(Tools)
|
—
|
—
|
—
|
—
|
—
|
—
|
—
|
—
|
|
|
Diagram: Clockwork Furnace, Socketed
(Clockwork Furnace, Socketed)
|
Workshop
(Machinery)
|
—
|
—
|
—
|
—
|
—
|
—
|
—
|
—
|
|
|
Diagram: Clockwork Goblet, Empty
(Clockwork Goblet, Empty)
|
Hearth
(Drinkware)
|
—
|
—
|
—
|
—
|
—
|
—
|
—
|
—
|
|
|
Diagram: Clockwork Keg, Sturdy
(Clockwork Keg, Sturdy)
|
Hearth
(Stockroom)
|
—
|
—
|
—
|
—
|
—
|
—
|
—
|
—
|
|
|
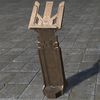
Diagram: Clockwork Lectern, Empty
(Clockwork Lectern, Empty)
|
Library
(Supplies)
|
—
|
—
|
—
|
—
|
—
|
—
|
—
|
—
|
|
|
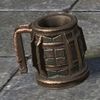
Diagram: Clockwork Mug, Reinforced
(Clockwork Mug, Reinforced)
|
Hearth
(Drinkware)
|
—
|
—
|
—
|
—
|
—
|
—
|
—
|
—
|
|
|
Diagram: Clockwork Nightstand, Octagonal
(Clockwork Nightstand, Octagonal)
|
Suite
(Nightstands)
|
—
|
—
|
—
|
—
|
—
|
—
|
—
|
—
|
|
|
Diagram: Clockwork Pump, Vertical
(Clockwork Pump, Vertical)
|
Workshop
(Pipes and Mechanisms)
|
—
|
—
|
—
|
—
|
—
|
—
|
—
|
—
|
|

|
Diagram: Clockwork Scales, Precision Calibrated
(Clockwork Scales, Precision Calibrated)
|
Workshop
(Tools)
|
—
|
—
|
—
|
—
|
—
|
—
|
—
|
—
|
|

|
Diagram: Clockwork Sequence Plaque, Single
(Clockwork Sequence Plaque, Single)
|
Library
(Literature)
|
—
|
—
|
—
|
—
|
—
|
—
|
—
|
—
|
|
|
Diagram: Clockwork Sequence Plaques, Folded
(Clockwork Sequence Plaques, Folded)
|
Library
(Literature)
|
—
|
—
|
—
|
—
|
—
|
—
|
—
|
—
|
|
|
Diagram: Clockwork Sequence Plaques, Unfolded
(Clockwork Sequence Plaques, Unfolded)
|
Library
(Literature)
|
—
|
—
|
—
|
—
|
—
|
—
|
—
|
—
|
|
|
Diagram: Clockwork Sequence Spool, Single
(Clockwork Sequence Spool, Single)
|
Library
(Shelves)
|
—
|
—
|
—
|
—
|
—
|
—
|
—
|
—
|
|
|
Diagram: Clockwork Sequence Spool, Triple
(Clockwork Sequence Spool, Triple)
|
Library
(Shelves)
|
—
|
—
|
—
|
—
|
—
|
—
|
—
|
—
|
|
|
Diagram: Clockwork Shelf, Wall
(Clockwork Shelf, Wall)
|
Library
(Shelves)
|
—
|
—
|
—
|
—
|
—
|
—
|
—
|
—
|
|
|
Diagram: Clockwork Somnolostation
(Clockwork Somnolostation)
|
Suite
(Bedding)
|
—
|
—
|
—
|
—
|
—
|
—
|
—
|
—
|
|

|
Diagram: Clockwork Stool, Practical
(Clockwork Stool, Practical)
|
Workshop
(Stools)
|
—
|
—
|
—
|
—
|
—
|
—
|
—
|
—
|
|
|
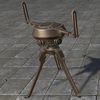
Diagram: Clockwork Surveyor's Tripod, Calibrated
(Clockwork Surveyor's Tripod, Calibrated)
|
Workshop
(Tools)
|
—
|
—
|
—
|
—
|
—
|
—
|
—
|
—
|
|
|
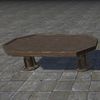
Diagram: Clockwork Table, Beveled
(Clockwork Table, Beveled)
|
Dining
(Tables)
|
—
|
—
|
—
|
—
|
—
|
—
|
—
|
—
|
|
|
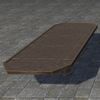
Diagram: Clockwork Table, Grand
(Clockwork Table, Grand)
|
Dining
(Tables)
|
—
|
—
|
—
|
—
|
—
|
—
|
—
|
—
|
|
|
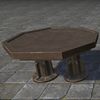
Diagram: Clockwork Table, Octagonal
(Clockwork Table, Octagonal)
|
Dining
(Tables)
|
—
|
—
|
—
|
—
|
—
|
—
|
—
|
—
|
|
|
Diagram: Clockwork Vent, Octagonal Fan
(Clockwork Vent, Octagonal Fan)
|
Workshop
(Machinery)
|
—
|
—
|
—
|
—
|
—
|
—
|
—
|
—
|
|
|
Diagram: Clockwork Wall Machinery, Arched
(Clockwork Wall Machinery, Arched)
|
Workshop
(Machinery)
|
—
|
—
|
—
|
—
|
—
|
—
|
—
|
—
|
|
|
Diagram: Clockwork Wardrobe, Precision Engineered
(Clockwork Wardrobe, Precision Engineered)
|
Suite
(Wardrobes)
|
—
|
—
|
—
|
—
|
—
|
—
|
—
|
—
|
|
|
Diagram: Common Cage, Hunting
(Common Cage, Hunting)
|
Workshop
(Tools)
|
—
|
—
|
—
|
—
|
—
|
—
|
—
|
—
|
|
|
Diagram: Common Cleaver, Cooking
(Common Cleaver, Cooking)
|
Hearth
(Utensils)
|
—
|
—
|
—
|
—
|
—
|
—
|
—
|
—
|
|
|
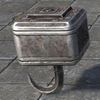
Diagram: Common Inkwell, Practical
(Common Inkwell, Practical)
|
Library
(Supplies)
|
—
|
—
|
—
|
—
|
—
|
—
|
—
|
—
|
|
|
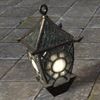
Diagram: Common Lantern, Hanging
(Common Lantern, Hanging)
|
Lighting
(Lanterns)
|
—
|
—
|
—
|
—
|
—
|
—
|
—
|
—
|
|
|
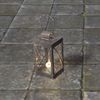
Diagram: Common Lantern, Stationary
(Common Lantern, Stationary)
|
Lighting
(Lanterns)
|
—
|
—
|
—
|
—
|
—
|
—
|
—
|
—
|
|
|
Diagram: Common Plate, Setting
(Common Plate, Setting)
|
Hearth
(Dishes)
|
—
|
—
|
—
|
—
|
—
|
—
|
—
|
—
|
|
|
Diagram: Common Plate, Simple
(Common Plate, Simple)
|
Hearth
(Dishes)
|
—
|
—
|
—
|
—
|
—
|
—
|
—
|
—
|
|
|
Diagram: Common Platter, Serving
(Common Platter, Serving)
|
Hearth
(Dishes)
|
—
|
—
|
—
|
—
|
—
|
—
|
—
|
—
|
|
|
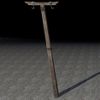
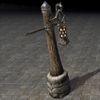
Diagram: Common Post, Flag Pole
(Common Post, Flag Pole)
|
Courtyard
(Posts and Pillars)
|
—
|
—
|
—
|
—
|
—
|
—
|
—
|
—
|
|
|
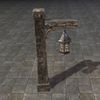
Diagram: Common Post, Sign Holder
(Common Post, Sign Holder)
|
Courtyard
(Posts and Pillars)
|
—
|
—
|
—
|
—
|
—
|
—
|
—
|
—
|
|
|
Diagram: Common Pot, Cooking
(Common Pot, Cooking)
|
Hearth
(Dishes)
|
—
|
—
|
—
|
—
|
—
|
—
|
—
|
—
|
|
|
Diagram: Common Skillet, Practical
(Common Skillet, Practical)
|
Hearth
(Dishes)
|
—
|
—
|
—
|
—
|
—
|
—
|
—
|
—
|
|
|
Diagram: Common Trap, Hunting
(Common Trap, Hunting)
|
Workshop
(Tools)
|
—
|
—
|
—
|
—
|
—
|
—
|
—
|
—
|
|
|
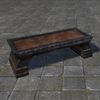
Diagram: Daedric Bench, Ashen
(Daedric Bench, Ashen)
|
Dining
(Benches)
|
—
|
—
|
—
|
—
|
—
|
—
|
—
|
—
|
|
|
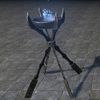
Diagram: Daedric Brazier, Coldharbour
(Daedric Brazier, Coldharbour)
|
Lighting
(Braziers)
|
—
|
—
|
—
|
—
|
—
|
—
|
—
|
—
|
|
|
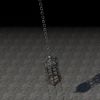
Diagram: Daedric Cage, Hanging
(Daedric Cage, Hanging)
|
Undercroft
(Torture)
|
—
|
—
|
—
|
—
|
—
|
—
|
—
|
—
|
|

|
Diagram: Daedric Chandelier, Ritual
(Daedric Chandelier, Ritual)
|
Lighting
(Chandeliers)
|
—
|
—
|
—
|
—
|
—
|
—
|
—
|
—
|
|
|
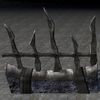
Diagram: Daedric Fence, Section
(Daedric Fence, Section)
|
Structures
(Walls and Fences)
|
—
|
—
|
—
|
—
|
—
|
—
|
—
|
—
|
|
|
Diagram: Daedric Pedestal, Ritual
(Daedric Pedestal, Ritual)
|
Dining
(Tables)
|
—
|
—
|
—
|
—
|
—
|
—
|
—
|
—
|
|
|
Diagram: Dark Elf Basin, Ringed
(Dark Elf Basin, Ringed)
|
Undercroft
(Basins)
|
—
|
—
|
—
|
—
|
—
|
—
|
—
|
—
|
|
|
Diagram: Dark Elf Candelabra, Angled
(Dark Elf Candelabra, Angled)
|
Lighting
(Candles)
|
—
|
—
|
—
|
—
|
—
|
—
|
—
|
—
|
|
|
Diagram: Dark Elf Candle, Claw Base
(Dark Elf Candle, Claw Base)
|
Lighting
(Candles)
|
—
|
—
|
—
|
—
|
—
|
—
|
—
|
—
|
|
|
Diagram: Dark Elf Candle, Votive Tray
(Dark Elf Candle, Votive Tray)
|
Lighting
(Candles)
|
—
|
—
|
—
|
—
|
—
|
—
|
—
|
—
|
|
|
Diagram: Dark Elf Cauldron, Banded
(Dark Elf Cauldron, Banded)
|
Hearth
(Cookware)
|
—
|
—
|
—
|
—
|
—
|
—
|
—
|
—
|
|
|
Diagram: Dark Elf Cauldron, Ringed
(Dark Elf Cauldron, Ringed)
|
Hearth
(Cookware)
|
—
|
—
|
—
|
—
|
—
|
—
|
—
|
—
|
|
|
Diagram: Dark Elf Censer, Hanging
(Dark Elf Censer, Hanging)
|
Undercroft
(Incense)
|
—
|
—
|
—
|
—
|
—
|
—
|
—
|
—
|
|
|
Diagram: Dark Elf Hook, Wall
(Dark Elf Hook, Wall)
|
Gallery
(Art)
|
—
|
—
|
—
|
—
|
—
|
—
|
—
|
—
|
|
|
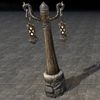
Diagram: Dark Elf Kettle Cooker
(Dark Elf Kettle Cooker)
|
Hearth
(Stockroom)
|
—
|
—
|
—
|
—
|
—
|
—
|
—
|
—
|
|
|
Diagram: Dark Elf Lantern, Ashen
(Dark Elf Lantern, Ashen)
|
Lighting
(Lanterns)
|
—
|
—
|
—
|
—
|
—
|
—
|
—
|
—
|
|
|
Diagram: Dark Elf Lantern, Caged
(Dark Elf Lantern, Caged)
|
Lighting
(Lanterns)
|
—
|
—
|
—
|
—
|
—
|
—
|
—
|
—
|
|
|
Diagram: Dark Elf Lantern, Hanging
(Dark Elf Lantern, Hanging)
|
Lighting
(Lanterns)
|
—
|
—
|
—
|
—
|
—
|
—
|
—
|
—
|
|
|
Diagram: Dark Elf Medallion, Tribunal
(Dark Elf Medallion, Tribunal)
|
Gallery
(Art)
|
—
|
—
|
—
|
—
|
—
|
—
|
—
|
—
|
|
|
Diagram: Dark Elf Pot, Banded
(Dark Elf Pot, Banded)
|
Hearth
(Pottery)
|
—
|
—
|
—
|
—
|
—
|
—
|
—
|
—
|
|
|
Diagram: Dark Elf Pot, Scaled
(Dark Elf Pot, Scaled)
|
Hearth
(Pottery)
|
—
|
—
|
—
|
—
|
—
|
—
|
—
|
—
|
|
|
Diagram: Dark Elf Streetlamp, Stone
(Dark Elf Streetlamp, Stone)
|
Lighting
(Lightposts)
|
—
|
—
|
—
|
—
|
—
|
—
|
—
|
—
|
|
|
Diagram: Dark Elf Streetlamps, Stone
(Dark Elf Streetlamps, Stone)
|
Lighting
(Lightposts)
|
—
|
—
|
—
|
—
|
—
|
—
|
—
|
—
|
|

|
Diagram: Dark Elf Thurible, Caged
(Dark Elf Thurible, Caged)
|
Undercroft
(Incense)
|
—
|
—
|
—
|
—
|
—
|
—
|
—
|
—
|
|
|
Diagram: Dark Elf Urn, Banded
(Dark Elf Urn, Banded)
|
Hearth
(Pottery)
|
—
|
—
|
—
|
—
|
—
|
—
|
—
|
—
|
|
|
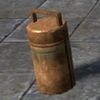
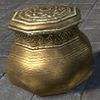
Diagram: Dres Cannister, Portable
(Dres Cannister, Portable)
|
Hearth
(Pottery)
|
—
|
—
|
—
|
—
|
—
|
—
|
—
|
—
|
|

|
Diagram: Dres Cauldron, Floral Banded
(Dres Cauldron, Floral Banded)
|
Hearth
(Cookware)
|
—
|
—
|
—
|
—
|
—
|
—
|
—
|
—
|
|
|
Diagram: Dres Pot, Sauce
(Dres Pot, Sauce)
|
Hearth
(Cookware)
|
—
|
—
|
—
|
—
|
—
|
—
|
—
|
—
|
|
|
Diagram: Dwarven Bench, Forged
(Dwarven Bench, Forged)
|
Dining
(Benches)
|
—
|
—
|
—
|
—
|
—
|
—
|
—
|
—
|
|
|
Diagram: Dwarven Boiler, Central
(Dwarven Boiler, Central)
|
Structures
(Building Components)
|
—
|
—
|
—
|
—
|
—
|
—
|
—
|
—
|
|
|
Diagram: Dwarven Bowl, Forged
(Dwarven Bowl, Forged)
|
Hearth
(Dishes)
|
—
|
—
|
—
|
—
|
—
|
—
|
—
|
—
|
|
|
Diagram: Dwarven Bowl, Forged Serving
(Dwarven Bowl, Forged Serving)
|
Hearth
(Dishes)
|
—
|
—
|
—
|
—
|
—
|
—
|
—
|
—
|
|

|
Diagram: Dwarven Cannister, Sealed
(Dwarven Cannister, Sealed)
|
Hearth
(Pottery)
|
—
|
—
|
—
|
—
|
—
|
—
|
—
|
—
|
|
|
Diagram: Dwarven Chandelier, Barred
(Dwarven Chandelier, Barred)
|
Lighting
(Chandeliers)
|
—
|
—
|
—
|
—
|
—
|
—
|
—
|
—
|
|
|
Diagram: Dwarven Chandelier, Braced
(Dwarven Chandelier, Braced)
|
Lighting
(Chandeliers)
|
—
|
—
|
—
|
—
|
—
|
—
|
—
|
—
|
|

|
Diagram: Dwarven Chandelier, Caged
(Dwarven Chandelier, Caged)
|
Lighting
(Chandeliers)
|
—
|
—
|
—
|
—
|
—
|
—
|
—
|
—
|
|
|
Diagram: Dwarven Chandelier, Framework
(Dwarven Chandelier, Framework)
|
Lighting
(Chandeliers)
|
—
|
—
|
—
|
—
|
—
|
—
|
—
|
—
|
|
|
Diagram: Dwarven Engine, Boiler
(Dwarven Engine, Boiler)
|
Workshop
(Pipes and Mechanisms)
|
—
|
—
|
—
|
—
|
—
|
—
|
—
|
—
|
|
|
Diagram: Dwarven Engine, Fan
(Dwarven Engine, Fan)
|
Workshop
(Pipes and Mechanisms)
|
—
|
—
|
—
|
—
|
—
|
—
|
—
|
—
|
|
|
Diagram: Dwarven Engine, Switch
(Dwarven Engine, Switch)
|
Workshop
(Pipes and Mechanisms)
|
—
|
—
|
—
|
—
|
—
|
—
|
—
|
—
|
|
|
Diagram: Dwarven Engine, Turbine
(Dwarven Engine, Turbine)
|
Workshop
(Pipes and Mechanisms)
|
—
|
—
|
—
|
—
|
—
|
—
|
—
|
—
|
|
|
Diagram: Dwarven Goblet, Forged
(Dwarven Goblet, Forged)
|
Hearth
(Drinkware)
|
—
|
—
|
—
|
—
|
—
|
—
|
—
|
—
|
|

|
Diagram: Dwarven Gyroscope, Masterwork
(Dwarven Gyroscope, Masterwork)
|
Workshop
(Tools)
|
—
|
—
|
—
|
—
|
—
|
—
|
—
|
—
|
|
|
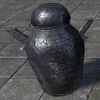
Diagram: Dwarven Jar, Sealed
(Dwarven Jar, Sealed)
|
Hearth
(Pottery)
|
—
|
—
|
—
|
—
|
—
|
—
|
—
|
—
|
|
|
Diagram: Dwarven Jug, Sealed
(Dwarven Jug, Sealed)
|
Hearth
(Pottery)
|
—
|
—
|
—
|
—
|
—
|
—
|
—
|
—
|
|
|
Diagram: Dwarven Pew, Refined
(Dwarven Pew, Refined)
|
Parlor
(Sofas and Couches)
|
—
|
—
|
—
|
—
|
—
|
—
|
—
|
—
|
|
|
Diagram: Dwarven Pipe Cap, Bolted
(Dwarven Pipe Cap, Bolted)
|
Workshop
(Pipes and Mechanisms)
|
—
|
—
|
—
|
—
|
—
|
—
|
—
|
—
|
|
|
Diagram: Dwarven Pipe, Corner
(Dwarven Pipe, Corner)
|
Workshop
(Pipes and Mechanisms)
|
—
|
—
|
—
|
—
|
—
|
—
|
—
|
—
|
|
|
Diagram: Dwarven Pipe, Elbow
(Dwarven Pipe, Elbow)
|
Workshop
(Pipes and Mechanisms)
|
—
|
—
|
—
|
—
|
—
|
—
|
—
|
—
|
|

|
Diagram: Dwarven Pipe, Full Column
(Dwarven Pipe, Full Column)
|
Workshop
(Pipes and Mechanisms)
|
—
|
—
|
—
|
—
|
—
|
—
|
—
|
—
|
|
|
Diagram: Dwarven Pipe, Half Column
(Dwarven Pipe, Half Column)
|
Workshop
(Pipes and Mechanisms)
|
—
|
—
|
—
|
—
|
—
|
—
|
—
|
—
|
|
|
Diagram: Dwarven Pipe, Quarter Column
(Dwarven Pipe, Quarter Column)
|
Workshop
(Pipes and Mechanisms)
|
—
|
—
|
—
|
—
|
—
|
—
|
—
|
—
|
|
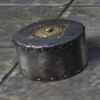
| 100px
|
(Dwarven Pipeline Cap, Sealed (small))
|
Workshop
(Pipes and Mechanisms)
|
—
|
—
|
—
|
—
|
—
|
—
|
—
|
—
|
- {{{2}}} x [[Online:{{{materials}}}|{{{materials}}}]]
|
| 100px
|
Diagram: Dwarven Pipeline Cap, Sealed
(Dwarven Pipeline Cap, Sealed (standard))
|
Workshop
(Pipes and Mechanisms)
|
—
|
—
|
—
|
—
|
—
|
—
|
—
|
—
|
|
|
Diagram: Dwarven Pipeline, Column
(Dwarven Pipeline, Column)
|
Workshop
(Pipes and Mechanisms)
|
—
|
—
|
—
|
—
|
—
|
—
|
—
|
—
|
|
|
Diagram: Dwarven Pipeline, Elbow
(Dwarven Pipeline, Elbow)
|
Workshop
(Pipes and Mechanisms)
|
—
|
—
|
—
|
—
|
—
|
—
|
—
|
—
|
|
|
Diagram: Dwarven Pipeline, Full Column
(Dwarven Pipeline, Full Column)
|
Workshop
(Pipes and Mechanisms)
|
—
|
—
|
—
|
—
|
—
|
—
|
—
|
—
|
|
|
Diagram: Dwarven Pipeline, Junction
(Dwarven Pipeline, Junction)
|
Workshop
(Pipes and Mechanisms)
|
—
|
—
|
—
|
—
|
—
|
—
|
—
|
—
|
|
|
Diagram: Dwarven Plate, Forged
(Dwarven Plate, Forged)
|
Hearth
(Dishes)
|
—
|
—
|
—
|
—
|
—
|
—
|
—
|
—
|
|
|
Diagram: Dwarven Pot, Sealed
(Dwarven Pot, Sealed)
|
Hearth
(Pottery)
|
—
|
—
|
—
|
—
|
—
|
—
|
—
|
—
|
|
|
Diagram: Dwarven Table, Workbench
(Dwarven Table, Workbench)
|
Dining
(Tables)
|
—
|
—
|
—
|
—
|
—
|
—
|
—
|
—
|
|

|
Diagram: Dwarven Urn, Sealed
(Dwarven Urn, Sealed)
|
Undercroft
(Urns)
|
—
|
—
|
—
|
—
|
—
|
—
|
—
|
—
|
|
|
Diagram: Dwarven Valve, Disconnected
(Dwarven Valve, Disconnected)
|
Structures
(Building Components)
|
—
|
—
|
—
|
—
|
—
|
—
|
—
|
—
|
|
|
Diagram: Dwarven Vase, Forged
(Dwarven Vase, Forged)
|
Parlor
(Vases)
|
—
|
—
|
—
|
—
|
—
|
—
|
—
|
—
|
|
|
Diagram: Dwarven Vessel, Sealed
(Dwarven Vessel, Sealed)
|
Hearth
(Pottery)
|
—
|
—
|
—
|
—
|
—
|
—
|
—
|
—
|
|

|
Diagram: Elsweyr Gate, Masterwork
(Elsweyr Gate, Masterwork)
|
Structures
(Doorways)
|
—
|
—
|
—
|
—
|
—
|
—
|
—
|
—
|
|
|
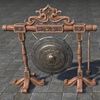
Diagram: Elsweyr Gong, Ornate
(Elsweyr Gong, Ornate)
|
Parlor
(Instruments)
|
—
|
—
|
—
|
—
|
—
|
—
|
—
|
—
|
|

|
Diagram: Fireplace Grate, Wrought Iron
(Fireplace Grate, Wrought Iron)
|
Workshop
(Tools)
|
—
|
—
|
—
|
—
|
—
|
—
|
—
|
—
|
|
|
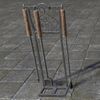
Diagram: Fireplace Tools, Wrought Iron
(Fireplace Tools, Wrought Iron)
|
Workshop
(Tools)
|
—
|
—
|
—
|
—
|
—
|
—
|
—
|
—
|
|
|
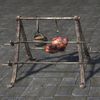
Diagram: Grilling Rack
(Grilling Rack)
|
Hearth
(Meats and Cheeses)
|
—
|
—
|
—
|
—
|
—
|
—
|
—
|
—
|
|
|
Diagram: Hakoshae Hook, Block
(Hakoshae Hook, Block)
|
Courtyard
(Posts and Pillars)
|
—
|
—
|
—
|
—
|
—
|
—
|
—
|
—
|
|
|
Diagram: Hakoshae Pillar, Wooden Hooked
(Hakoshae Pillar, Wooden Hooked)
|
Courtyard
(Posts and Pillars)
|
—
|
—
|
—
|
—
|
—
|
—
|
—
|
—
|
|
|
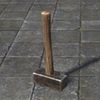
Diagram: Hammer, Forge
(Hammer, Forge)
|
Workshop
(Tools)
|
—
|
—
|
—
|
—
|
—
|
—
|
—
|
—
|
|
|
Diagram: High Elf Basin, Gilded
(High Elf Basin, Gilded)
|
Undercroft
(Basins)
|
—
|
—
|
—
|
—
|
—
|
—
|
—
|
—
|
|
|
Diagram: High Elf Basin, Standing
(High Elf Basin, Standing)
|
Suite
(Bathing Goods)
|
—
|
—
|
—
|
—
|
—
|
—
|
—
|
—
|
|
|
Diagram: High Elf Basin, Winged
(High Elf Basin, Winged)
|
Undercroft
(Basins)
|
—
|
—
|
—
|
—
|
—
|
—
|
—
|
—
|
|
|
Diagram: High Elf Bowl, Serving
(High Elf Bowl, Serving)
|
Hearth
(Dishes)
|
—
|
—
|
—
|
—
|
—
|
—
|
—
|
—
|
|
|
Diagram: High Elf Brazier, Winged
(High Elf Brazier, Winged)
|
Lighting
(Braziers)
|
—
|
—
|
—
|
—
|
—
|
—
|
—
|
—
|
|
|
Diagram: High Elf Candelabra, Winged
(High Elf Candelabra, Winged)
|
Lighting
(Candles)
|
—
|
—
|
—
|
—
|
—
|
—
|
—
|
—
|
|
|
Diagram: High Elf Candle, Winged
(High Elf Candle, Winged)
|
Lighting
(Candles)
|
—
|
—
|
—
|
—
|
—
|
—
|
—
|
—
|
|
|
Diagram: High Elf Candleholder, Sturdy
(High Elf Candleholder, Sturdy)
|
Lighting
(Candles)
|
—
|
—
|
—
|
—
|
—
|
—
|
—
|
—
|
|
|
Diagram: High Elf Carafe, Gilded
(High Elf Carafe, Gilded)
|
Hearth
(Drinkware)
|
—
|
—
|
—
|
—
|
—
|
—
|
—
|
—
|
|
|
Diagram: High Elf Chandelier, Winged
(High Elf Chandelier, Winged)
|
Lighting
(Chandeliers)
|
—
|
—
|
—
|
—
|
—
|
—
|
—
|
—
|
|
|
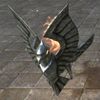
Diagram: High Elf Crest, Winged
(High Elf Crest, Winged)
|
Gallery
(Art)
|
—
|
—
|
—
|
—
|
—
|
—
|
—
|
—
|
|
|
Diagram: High Elf Cup, Gilded
(High Elf Cup, Gilded)
|
Hearth
(Drinkware)
|
—
|
—
|
—
|
—
|
—
|
—
|
—
|
—
|
|
|
Diagram: High Elf Divider, Delicate
(High Elf Divider, Delicate)
|
Suite
(Dividers)
|
—
|
—
|
—
|
—
|
—
|
—
|
—
|
—
|
|
|
Diagram: High Elf Flask, Gilded
(High Elf Flask, Gilded)
|
Hearth
(Drinkware)
|
—
|
—
|
—
|
—
|
—
|
—
|
—
|
—
|
|
|
Diagram: High Elf Flute, Wine
(High Elf Flute, Wine)
|
Hearth
(Drinkware)
|
—
|
—
|
—
|
—
|
—
|
—
|
—
|
—
|
|

|
Diagram: High Elf Goblet, Winged
(High Elf Goblet, Winged)
|
Hearth
(Drinkware)
|
—
|
—
|
—
|
—
|
—
|
—
|
—
|
—
|
|
|
Diagram: High Elf Lamp, Oil
(High Elf Lamp, Oil)
|
Lighting
(Lamps)
|
—
|
—
|
—
|
—
|
—
|
—
|
—
|
—
|
|
|
Diagram: High Elf Medal, Winged
(High Elf Medal, Winged)
|
Gallery
(Art)
|
—
|
—
|
—
|
—
|
—
|
—
|
—
|
—
|
|
|
Diagram: High Elf Plate, Dinner
(High Elf Plate, Dinner)
|
Hearth
(Dishes)
|
—
|
—
|
—
|
—
|
—
|
—
|
—
|
—
|
|
|
Diagram: High Elf Platter, Gilded
(High Elf Platter, Gilded)
|
Hearth
(Dishes)
|
—
|
—
|
—
|
—
|
—
|
—
|
—
|
—
|
|
|
Diagram: High Elf Platter, Winged
(High Elf Platter, Winged)
|
Hearth
(Dishes)
|
—
|
—
|
—
|
—
|
—
|
—
|
—
|
—
|
|
|
Diagram: High Elf Pot, Hanging
(High Elf Pot, Hanging)
|
Hearth
(Pottery)
|
—
|
—
|
—
|
—
|
—
|
—
|
—
|
—
|
|
|
Diagram: High Elf Sconce, Winged
(High Elf Sconce, Winged)
|
Lighting
(Sconces)
|
—
|
—
|
—
|
—
|
—
|
—
|
—
|
—
|
|
|
Diagram: High Elf Trunk, Jeweled
(High Elf Trunk, Jeweled)
|
Suite
(Trunks)
|
—
|
—
|
—
|
—
|
—
|
—
|
—
|
—
|
|
|
Diagram: High Elf Vase, Gilded
(High Elf Vase, Gilded)
|
Parlor
(Vases)
|
—
|
—
|
—
|
—
|
—
|
—
|
—
|
—
|
|
|
Diagram: Hlaalu Boxes, Compact
(Hlaalu Boxes, Compact)
|
Parlor
(Knick-Knacks)
|
—
|
—
|
—
|
—
|
—
|
—
|
—
|
—
|
|
|
Diagram: Hlaalu Cannister, Trinket
(Hlaalu Cannister, Trinket)
|
Parlor
(Knick-Knacks)
|
—
|
—
|
—
|
—
|
—
|
—
|
—
|
—
|
|
|
Diagram: Hlaalu Gong
(Hlaalu Gong)
|
Parlor
(Instruments)
|
—
|
—
|
—
|
—
|
—
|
—
|
—
|
—
|
|
|
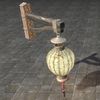
Diagram: Hlaalu Sconce, Vellum
(Hlaalu Sconce, Vellum)
|
Lighting
(Sconces)
|
—
|
—
|
—
|
—
|
—
|
—
|
—
|
—
|
|
|
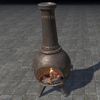
Diagram: Hlaalu Stove, Chiminea
(Hlaalu Stove, Chiminea)
|
Lighting
(Fires)
|
—
|
—
|
—
|
—
|
—
|
—
|
—
|
—
|
|
|
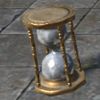
Diagram: Hourglass, Common
(Hourglass, Common)
|
Parlor
(Knick-Knacks)
|
—
|
—
|
—
|
—
|
—
|
—
|
—
|
—
|
|
|
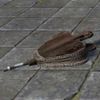
Diagram: Indoril Bellows, Practical
(Indoril Bellows, Practical)
|
Workshop
(Tools)
|
—
|
—
|
—
|
—
|
—
|
—
|
—
|
—
|
|
|
Diagram: Indoril Box, Trinket
(Indoril Box, Trinket)
|
Parlor
(Knick-Knacks)
|
—
|
—
|
—
|
—
|
—
|
—
|
—
|
—
|
|
|
Diagram: Indoril Brazier, Cauldron
(Indoril Brazier, Cauldron)
|
Lighting
(Braziers)
|
—
|
—
|
—
|
—
|
—
|
—
|
—
|
—
|
|
|
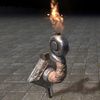
Diagram: Indoril Brazier, Kettle
(Indoril Brazier, Kettle)
|
Lighting
(Braziers)
|
—
|
—
|
—
|
—
|
—
|
—
|
—
|
—
|
|
|
Diagram: Indoril Brazier, Knotwork
(Indoril Brazier, Knotwork)
|
Lighting
(Braziers)
|
—
|
—
|
—
|
—
|
—
|
—
|
—
|
—
|
|
|
Diagram: Indoril Brazier, Pedestal
(Indoril Brazier, Pedestal)
|
Lighting
(Braziers)
|
—
|
—
|
—
|
—
|
—
|
—
|
—
|
—
|
|
|
Diagram: Indoril Cannister, Trinket
(Indoril Cannister, Trinket)
|
Parlor
(Knick-Knacks)
|
—
|
—
|
—
|
—
|
—
|
—
|
—
|
—
|
|
|
Diagram: Indoril Cassone, Sealed
(Indoril Cassone, Sealed)
|
Parlor
(Knick-Knacks)
|
—
|
—
|
—
|
—
|
—
|
—
|
—
|
—
|
|
|
Diagram: Indoril Chandelier, Knotwork
(Indoril Chandelier, Knotwork)
|
Lighting
(Chandeliers)
|
—
|
—
|
—
|
—
|
—
|
—
|
—
|
—
|
|
|
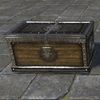
Diagram: Indoril Chest, Fortified
(Indoril Chest, Fortified)
|
Suite
(Trunks)
|
—
|
—
|
—
|
—
|
—
|
—
|
—
|
—
|
|
|
Diagram: Indoril Footlocker, Fortified
(Indoril Footlocker, Fortified)
|
Suite
(Trunks)
|
—
|
—
|
—
|
—
|
—
|
—
|
—
|
—
|
|

|
Diagram: Indoril Platter, Floral
(Indoril Platter, Floral)
|
Hearth
(Dishes)
|
—
|
—
|
—
|
—
|
—
|
—
|
—
|
—
|
|

|
Diagram: Indoril Vault, Sealed
(Indoril Vault, Sealed)
|
Suite
(Trunks)
|
—
|
—
|
—
|
—
|
—
|
—
|
—
|
—
|
|
|
Diagram: Kennel, Locked
(Kennel, Locked)
|
Undercroft
(Torture)
|
—
|
—
|
—
|
—
|
—
|
—
|
—
|
—
|
|
|
Diagram: Khajiit Barstool, Clawfoot
(Khajiit Barstool, Clawfoot)
|
Workshop
(Stools)
|
—
|
—
|
—
|
—
|
—
|
—
|
—
|
—
|
|
|
Diagram: Khajiit Basin, Claw
(Khajiit Basin, Claw)
|
Undercroft
(Basins)
|
—
|
—
|
—
|
—
|
—
|
—
|
—
|
—
|
|
|
Diagram: Khajiit Brazier, Claw
(Khajiit Brazier, Claw)
|
Lighting
(Braziers)
|
—
|
—
|
—
|
—
|
—
|
—
|
—
|
—
|
|
|
Diagram: Khajiit Brazier, Hanging
(Khajiit Brazier, Hanging)
|
Lighting
(Chandeliers)
|
—
|
—
|
—
|
—
|
—
|
—
|
—
|
—
|
|
|
Diagram: Khajiit Candle, Clawfoot
(Khajiit Candle, Clawfoot)
|
Lighting
(Candles)
|
—
|
—
|
—
|
—
|
—
|
—
|
—
|
—
|
|
|
Diagram: Khajiit Candle-Filled Lamp
(Khajiit Candle-Filled Lamp)
|
Lighting
(Lamps)
|
—
|
—
|
—
|
—
|
—
|
—
|
—
|
—
|
|
|
Diagram: Khajiit Candles, Clawfoot
(Khajiit Candles, Clawfoot)
|
Lighting
(Candles)
|
—
|
—
|
—
|
—
|
—
|
—
|
—
|
—
|
|
|
Diagram: Khajiit Footlocker, Arched
(Khajiit Footlocker, Arched)
|
Suite
(Trunks)
|
—
|
—
|
—
|
—
|
—
|
—
|
—
|
—
|
|
|
Diagram: Khajiit Lantern, Hanging
(Khajiit Lantern, Hanging)
|
Lighting
(Lanterns)
|
—
|
—
|
—
|
—
|
—
|
—
|
—
|
—
|
|
|
Diagram: Khajiit Sconce, Spiked
(Khajiit Sconce, Spiked)
|
Lighting
(Sconces)
|
—
|
—
|
—
|
—
|
—
|
—
|
—
|
—
|
|
|
Diagram: Lantern, Hanging
(Lantern, Hanging)
|
Lighting
(Lanterns)
|
—
|
—
|
—
|
—
|
—
|
—
|
—
|
—
|
|
|
Diagram: Lantern, Stationary
(Lantern, Stationary)
|
Lighting
(Lanterns)
|
—
|
—
|
—
|
—
|
—
|
—
|
—
|
—
|
|
|
Diagram: Murkmire Brazier, Bowl
(Murkmire Brazier, Bowl)
|
Lighting
(Braziers)
|
—
|
—
|
—
|
—
|
—
|
—
|
—
|
—
|
|
|
Diagram: Nord Brazier, Hanging
(Nord Brazier, Hanging)
|
Lighting
(Chandeliers)
|
—
|
—
|
—
|
—
|
—
|
—
|
—
|
—
|
|
|
Diagram: Nord Candle, Antler
(Nord Candle, Antler)
|
Lighting
(Candles)
|
—
|
—
|
—
|
—
|
—
|
—
|
—
|
—
|
|
|
Diagram: Nord Candle, Tealight
(Nord Candle, Tealight)
|
Lighting
(Candles)
|
—
|
—
|
—
|
—
|
—
|
—
|
—
|
—
|
|

|
Diagram: Nord Candleholder, Cup
(Nord Candleholder, Cup)
|
Lighting
(Candles)
|
—
|
—
|
—
|
—
|
—
|
—
|
—
|
—
|
|
|
Diagram: Nord Chandelier, Antler
(Nord Chandelier, Antler)
|
Lighting
(Chandeliers)
|
—
|
—
|
—
|
—
|
—
|
—
|
—
|
—
|
|
|
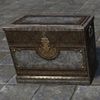
Diagram: Nord Chest, Latched
(Nord Chest, Latched)
|
Suite
(Trunks)
|
—
|
—
|
—
|
—
|
—
|
—
|
—
|
—
|
|
|
Diagram: Nord Crockpot, Covered
(Nord Crockpot, Covered)
|
Hearth
(Dishes)
|
—
|
—
|
—
|
—
|
—
|
—
|
—
|
—
|
|
|
Diagram: Nord Lamppost, Stone
(Nord Lamppost, Stone)
|
Lighting
(Lightposts)
|
—
|
—
|
—
|
—
|
—
|
—
|
—
|
—
|
|
|
Diagram: Nord Lantern, Cage
(Nord Lantern, Cage)
|
Lighting
(Lanterns)
|
—
|
—
|
—
|
—
|
—
|
—
|
—
|
—
|
|
|
Diagram: Nord Lantern, Hanging
(Nord Lantern, Hanging)
|
Lighting
(Lanterns)
|
—
|
—
|
—
|
—
|
—
|
—
|
—
|
—
|
|
|
Diagram: Nord Pot, Covered
(Nord Pot, Covered)
|
Hearth
(Dishes)
|
—
|
—
|
—
|
—
|
—
|
—
|
—
|
—
|
|
|
Diagram: Nord Streetlamps, Stone
(Nord Streetlamps, Stone)
|
Lighting
(Lightposts)
|
—
|
—
|
—
|
—
|
—
|
—
|
—
|
—
|
|
|
Diagram: Orcish Bowl, Stone
(Orcish Bowl, Stone)
|
Hearth
(Dishes)
|
—
|
—
|
—
|
—
|
—
|
—
|
—
|
—
|
|
|
Diagram: Orcish Brazier, Bordered
(Orcish Brazier, Bordered)
|
Lighting
(Braziers)
|
—
|
—
|
—
|
—
|
—
|
—
|
—
|
—
|
|
|
Diagram: Orcish Brazier, Floor
(Orcish Brazier, Floor)
|
Lighting
(Braziers)
|
—
|
—
|
—
|
—
|
—
|
—
|
—
|
—
|
|
|
Diagram: Orcish Brazier, Hanging
(Orcish Brazier, Hanging)
|
Lighting
(Chandeliers)
|
—
|
—
|
—
|
—
|
—
|
—
|
—
|
—
|
|
|
Diagram: Orcish Brazier, Pedestal
(Orcish Brazier, Pedestal)
|
Lighting
(Braziers)
|
—
|
—
|
—
|
—
|
—
|
—
|
—
|
—
|
|
|
Diagram: Orcish Brazier, Tabletop
(Orcish Brazier, Tabletop)
|
Lighting
(Braziers)
|
—
|
—
|
—
|
—
|
—
|
—
|
—
|
—
|
|
|
Diagram: Orcish Cauldron, Sealed
(Orcish Cauldron, Sealed)
|
Undercroft
(Urns)
|
—
|
—
|
—
|
—
|
—
|
—
|
—
|
—
|
|

|
Diagram: Orcish Chandelier, Practical
(Orcish Chandelier, Practical)
|
Lighting
(Chandeliers)
|
—
|
—
|
—
|
—
|
—
|
—
|
—
|
—
|
|
|
Diagram: Orcish Chandelier, Spiked
(Orcish Chandelier, Spiked)
|
Lighting
(Chandeliers)
|
—
|
—
|
—
|
—
|
—
|
—
|
—
|
—
|
|
|
Diagram: Orcish Chest, Buckled
(Orcish Chest, Buckled)
|
Suite
(Trunks)
|
—
|
—
|
—
|
—
|
—
|
—
|
—
|
—
|
|
|
Diagram: Orcish Footlocker, Buckled
(Orcish Footlocker, Buckled)
|
Suite
(Trunks)
|
—
|
—
|
—
|
—
|
—
|
—
|
—
|
—
|
|

|
Diagram: Orcish Knife, Kitchen
(Orcish Knife, Kitchen)
|
Hearth
(Utensils)
|
—
|
—
|
—
|
—
|
—
|
—
|
—
|
—
|
|
|
Diagram: Orcish Lantern, Hanging
(Orcish Lantern, Hanging)
|
Lighting
(Lanterns)
|
—
|
—
|
—
|
—
|
—
|
—
|
—
|
—
|
|
|
Diagram: Orcish Lantern, Hooded
(Orcish Lantern, Hooded)
|
Lighting
(Lanterns)
|
—
|
—
|
—
|
—
|
—
|
—
|
—
|
—
|
|
|
Diagram: Orcish Mug, Rugged
(Orcish Mug, Rugged)
|
Hearth
(Drinkware)
|
—
|
—
|
—
|
—
|
—
|
—
|
—
|
—
|
|
|
Diagram: Orcish Plate, Stone
(Orcish Plate, Stone)
|
Hearth
(Dishes)
|
—
|
—
|
—
|
—
|
—
|
—
|
—
|
—
|
|
|
Diagram: Orcish Saucer, Stone
(Orcish Saucer, Stone)
|
Hearth
(Dishes)
|
—
|
—
|
—
|
—
|
—
|
—
|
—
|
—
|
|
|
Diagram: Orcish Sconce, Bordered
(Orcish Sconce, Bordered)
|
Lighting
(Sconces)
|
—
|
—
|
—
|
—
|
—
|
—
|
—
|
—
|
|
|
Diagram: Orcish Sconce, Caged
(Orcish Sconce, Caged)
|
Lighting
(Sconces)
|
—
|
—
|
—
|
—
|
—
|
—
|
—
|
—
|
|
|
Diagram: Orcish Sconce, Scrolled
(Orcish Sconce, Scrolled)
|
Lighting
(Sconces)
|
—
|
—
|
—
|
—
|
—
|
—
|
—
|
—
|
|

|
Diagram: Orcish Strongbox, Buckled
(Orcish Strongbox, Buckled)
|
Suite
(Trunks)
|
—
|
—
|
—
|
—
|
—
|
—
|
—
|
—
|
|
|
Diagram: Orcish Trunk, Buckled
(Orcish Trunk, Buckled)
|
Suite
(Trunks)
|
—
|
—
|
—
|
—
|
—
|
—
|
—
|
—
|
|
|
Diagram: Orcish Trunk, Heavy
(Orcish Trunk, Heavy)
|
Suite
(Trunks)
|
—
|
—
|
—
|
—
|
—
|
—
|
—
|
—
|
|
|
Diagram: Orcish Vessel, Sealed
(Orcish Vessel, Sealed)
|
Undercroft
(Urns)
|
—
|
—
|
—
|
—
|
—
|
—
|
—
|
—
|
|
|
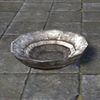
Diagram: Pie Dish, Empty
(Pie Dish, Empty)
|
Hearth
(Dishes)
|
—
|
—
|
—
|
—
|
—
|
—
|
—
|
—
|
|
|
Diagram: Redguard Bowl, Hanging Star
(Redguard Bowl, Hanging Star)
|
Hearth
(Pottery)
|
—
|
—
|
—
|
—
|
—
|
—
|
—
|
—
|
|
|
Diagram: Redguard Brazier, Enchanted
(Redguard Brazier, Enchanted)
|
Lighting
(Braziers)
|
—
|
—
|
—
|
—
|
—
|
—
|
—
|
—
|
|
|
Diagram: Redguard Brazier, Garish
(Redguard Brazier, Garish)
|
Lighting
(Braziers)
|
—
|
—
|
—
|
—
|
—
|
—
|
—
|
—
|
|
|
Diagram: Redguard Brazier, Robust
(Redguard Brazier, Robust)
|
Lighting
(Braziers)
|
—
|
—
|
—
|
—
|
—
|
—
|
—
|
—
|
|
|
Diagram: Redguard Candelabra, Polished
(Redguard Candelabra, Polished)
|
Lighting
(Candles)
|
—
|
—
|
—
|
—
|
—
|
—
|
—
|
—
|
|
|
Diagram: Redguard Candelabra, Twisted
(Redguard Candelabra, Twisted)
|
Lighting
(Candles)
|
—
|
—
|
—
|
—
|
—
|
—
|
—
|
—
|
|
|
Diagram: Redguard Candleholder, Practical
(Redguard Candleholder, Practical)
|
Lighting
(Candles)
|
—
|
—
|
—
|
—
|
—
|
—
|
—
|
—
|
|
|
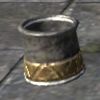
Diagram: Redguard Cannister, Gilded
(Redguard Cannister, Gilded)
|
Hearth
(Pottery)
|
—
|
—
|
—
|
—
|
—
|
—
|
—
|
—
|
|

|
Diagram: Redguard Cauldron, Clawfoot
(Redguard Cauldron, Clawfoot)
|
Undercroft
(Basins)
|
—
|
—
|
—
|
—
|
—
|
—
|
—
|
—
|
|
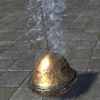
|
Diagram: Redguard Censer, Hanging Bell
(Redguard Censer, Hanging Bell)
|
Undercroft
(Incense)
|
—
|
—
|
—
|
—
|
—
|
—
|
—
|
—
|
|
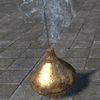
|
Diagram: Redguard Censer, Hanging Bulb
(Redguard Censer, Hanging Bulb)
|
Undercroft
(Incense)
|
—
|
—
|
—
|
—
|
—
|
—
|
—
|
—
|
|
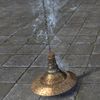
|
Diagram: Redguard Censer, Hanging Disc
(Redguard Censer, Hanging Disc)
|
Undercroft
(Incense)
|
—
|
—
|
—
|
—
|
—
|
—
|
—
|
—
|
|
|
Diagram: Redguard Censer, Hanging Horn
(Redguard Censer, Hanging Horn)
|
Undercroft
(Incense)
|
—
|
—
|
—
|
—
|
—
|
—
|
—
|
—
|
|
|
Diagram: Redguard Chalice, Empty
(Redguard Chalice, Empty)
|
Hearth
(Drinkware)
|
—
|
—
|
—
|
—
|
—
|
—
|
—
|
—
|
|
|
Diagram: Redguard Chalice, Full
(Redguard Chalice, Full)
|
Hearth
(Drinkware)
|
—
|
—
|
—
|
—
|
—
|
—
|
—
|
—
|
|

|
Diagram: Redguard Chandelier, Dark
(Redguard Chandelier, Dark)
|
Lighting
(Chandeliers)
|
—
|
—
|
—
|
—
|
—
|
—
|
—
|
—
|
|
|
Diagram: Redguard Chandelier, Grated
(Redguard Chandelier, Grated)
|
Lighting
(Chandeliers)
|
—
|
—
|
—
|
—
|
—
|
—
|
—
|
—
|
|
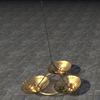
|
Diagram: Redguard Chandelier, Polished
(Redguard Chandelier, Polished)
|
Lighting
(Chandeliers)
|
—
|
—
|
—
|
—
|
—
|
—
|
—
|
—
|
|
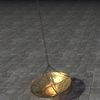
|
Diagram: Redguard Chandelier, Polished Grated
(Redguard Chandelier, Polished Grated)
|
Lighting
(Chandeliers)
|
—
|
—
|
—
|
—
|
—
|
—
|
—
|
—
|
|
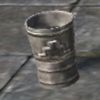
|
Diagram: Redguard Cup, Empty
(Redguard Cup, Empty)
|
Hearth
(Drinkware)
|
—
|
—
|
—
|
—
|
—
|
—
|
—
|
—
|
|
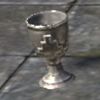
|
Diagram: Redguard Goblet, Empty
(Redguard Goblet, Empty)
|
Hearth
(Drinkware)
|
—
|
—
|
—
|
—
|
—
|
—
|
—
|
—
|
|
|
Diagram: Redguard Goblet, Full
(Redguard Goblet, Full)
|
Hearth
(Drinkware)
|
—
|
—
|
—
|
—
|
—
|
—
|
—
|
—
|
|
|
Diagram: Redguard Mug, Empty
(Redguard Mug, Empty)
|
Hearth
(Drinkware)
|
—
|
—
|
—
|
—
|
—
|
—
|
—
|
—
|
|
|
Diagram: Redguard Mug, Full
(Redguard Mug, Full)
|
Hearth
(Drinkware)
|
—
|
—
|
—
|
—
|
—
|
—
|
—
|
—
|
|
|
Diagram: Redguard Pot, Hanging Brushed
(Redguard Pot, Hanging Brushed)
|
Hearth
(Pottery)
|
—
|
—
|
—
|
—
|
—
|
—
|
—
|
—
|
|
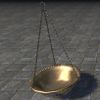
|
Diagram: Redguard Pot, Hanging Garish
(Redguard Pot, Hanging Garish)
|
Hearth
(Pottery)
|
—
|
—
|
—
|
—
|
—
|
—
|
—
|
—
|
|
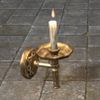
|
Diagram: Redguard Sconce, Polished
(Redguard Sconce, Polished)
|
Lighting
(Sconces)
|
—
|
—
|
—
|
—
|
—
|
—
|
—
|
—
|
|
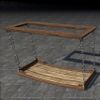
|
Diagram: Redguard Shelf, Barrel
(Redguard Shelf, Barrel)
|
Library
(Shelves)
|
—
|
—
|
—
|
—
|
—
|
—
|
—
|
—
|
|
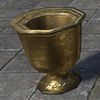
|
Diagram: Redguard Spittoon, Gilded
(Redguard Spittoon, Gilded)
|
Hearth
(Pottery)
|
—
|
—
|
—
|
—
|
—
|
—
|
—
|
—
|
|
|
Diagram: Redguard Streetlamp, Single
(Redguard Streetlamp, Single)
|
Lighting
(Lightposts)
|
—
|
—
|
—
|
—
|
—
|
—
|
—
|
—
|
|
|
Diagram: Redguard Streetlamps, Full
(Redguard Streetlamps, Full)
|
Lighting
(Lightposts)
|
—
|
—
|
—
|
—
|
—
|
—
|
—
|
—
|
|
|
Diagram: Redguard Streetlamps, Paired
(Redguard Streetlamps, Paired)
|
Lighting
(Lightposts)
|
—
|
—
|
—
|
—
|
—
|
—
|
—
|
—
|
|
|
Diagram: Redguard Streetlamps, Triple
(Redguard Streetlamps, Triple)
|
Lighting
(Lightposts)
|
—
|
—
|
—
|
—
|
—
|
—
|
—
|
—
|
|
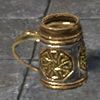
|
Diagram: Redguard Tankard, Empty
(Redguard Tankard, Empty)
|
Hearth
(Drinkware)
|
—
|
—
|
—
|
—
|
—
|
—
|
—
|
—
|
|
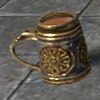
|
Diagram: Redguard Tankard, Full
(Redguard Tankard, Full)
|
Hearth
(Drinkware)
|
—
|
—
|
—
|
—
|
—
|
—
|
—
|
—
|
|
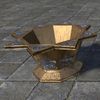
|
Diagram: Redguard Urn, Star
(Redguard Urn, Star)
|
Undercroft
(Urns)
|
—
|
—
|
—
|
—
|
—
|
—
|
—
|
—
|
|
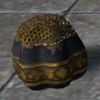
|
Diagram: Redoran Incense Holder, Mesh
(Redoran Incense Holder, Mesh)
|
Undercroft
(Incense)
|
—
|
—
|
—
|
—
|
—
|
—
|
—
|
—
|
|
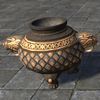
|
Diagram: Redoran Incense Pot, Beastly
(Redoran Incense Pot, Beastly)
|
Hearth
(Pottery)
|
—
|
—
|
—
|
—
|
—
|
—
|
—
|
—
|
|
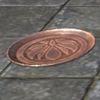
|
Diagram: Redoran Plate, Floral
(Redoran Plate, Floral)
|
Hearth
(Dishes)
|
—
|
—
|
—
|
—
|
—
|
—
|
—
|
—
|
|

|
Diagram: Redoran Plate, Meal
(Redoran Plate, Meal)
|
Hearth
(Dishes)
|
—
|
—
|
—
|
—
|
—
|
—
|
—
|
—
|
|
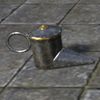
|
Diagram: Redoran Steamer, Iron
(Redoran Steamer, Iron)
|
Hearth
(Cookware)
|
—
|
—
|
—
|
—
|
—
|
—
|
—
|
—
|
|
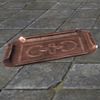
|
Diagram: Redoran Tray, Floral
(Redoran Tray, Floral)
|
Hearth
(Dishes)
|
—
|
—
|
—
|
—
|
—
|
—
|
—
|
—
|
|
|
Diagram: Relic Vault, Impenetrable
(Relic Vault, Impenetrable)
|
Workshop
(Cargo)
|
—
|
—
|
—
|
—
|
—
|
—
|
—
|
—
|
|
|
Diagram: Rough Bowl, Common
(Rough Bowl, Common)
|
Hearth
(Dishes)
|
—
|
—
|
—
|
—
|
—
|
—
|
—
|
—
|
|
|
Diagram: Rough Cup, Empty
(Rough Cup, Empty)
|
Hearth
(Drinkware)
|
—
|
—
|
—
|
—
|
—
|
—
|
—
|
—
|
|
|
Diagram: Rough Hatchet, Practical
(Rough Hatchet, Practical)
|
Workshop
(Tools)
|
—
|
—
|
—
|
—
|
—
|
—
|
—
|
—
|
|
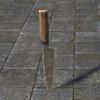
|
Diagram: Rough Knife, Butcher
(Rough Knife, Butcher)
|
Hearth
(Utensils)
|
—
|
—
|
—
|
—
|
—
|
—
|
—
|
—
|
|
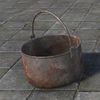
|
Diagram: Solitude Cauldron, Flat-Bottomed
(Solitude Cauldron, Flat-Bottomed)
|
Hearth
(Cookware)
|
—
|
—
|
—
|
—
|
—
|
—
|
—
|
—
|
|
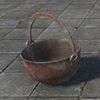
|
Diagram: Solitude Cauldron, Hanging
(Solitude Cauldron, Hanging)
|
Hearth
(Cookware)
|
—
|
—
|
—
|
—
|
—
|
—
|
—
|
—
|
|
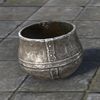
|
Diagram: Solitude Cauldron, Metal Empty
(Solitude Cauldron, Metal Empty)
|
Hearth
(Cookware)
|
—
|
—
|
—
|
—
|
—
|
—
|
—
|
—
|
|
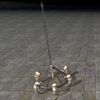
|
Diagram: Solitude Chandelier, Horns
(Solitude Chandelier, Horns)
|
Lighting
(Chandeliers)
|
—
|
—
|
—
|
—
|
—
|
—
|
—
|
—
|
|
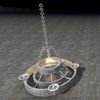
|
Diagram: Solitude Chandelier, Steel
(Solitude Chandelier, Steel)
|
Lighting
(Chandeliers)
|
—
|
—
|
—
|
—
|
—
|
—
|
—
|
—
|
|
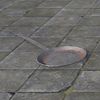
|
Diagram: Solitude Frying Pan, Long-Handled
(Solitude Frying Pan, Long-Handled)
|
Hearth
(Cookware)
|
—
|
—
|
—
|
—
|
—
|
—
|
—
|
—
|
|
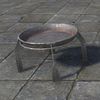
|
Diagram: Solitude Frying Pan, Trivet
(Solitude Frying Pan, Trivet)
|
Hearth
(Cookware)
|
—
|
—
|
—
|
—
|
—
|
—
|
—
|
—
|
|
|
Diagram: Solitude Frying Pan, Wood Handle
(Solitude Frying Pan, Wood Handle)
|
Hearth
(Cookware)
|
—
|
—
|
—
|
—
|
—
|
—
|
—
|
—
|
|
|
Diagram: Solitude Gravy Boat, Metal
(Solitude Gravy Boat, Metal)
|
Hearth
(Dishes)
|
—
|
—
|
—
|
—
|
—
|
—
|
—
|
—
|
|
|
Diagram: Solitude Hammer, Simple
(Solitude Hammer, Simple)
|
Workshop
(Tools)
|
—
|
—
|
—
|
—
|
—
|
—
|
—
|
—
|
|
|
Diagram: Solitude Hand-Drill, Simple
(Solitude Hand-Drill, Simple)
|
Workshop
(Tools)
|
—
|
—
|
—
|
—
|
—
|
—
|
—
|
—
|
|
|
Diagram: Solitude Hand Mirror, Elegant
(Solitude Hand Mirror, Elegant)
|
Suite
(Mirrors)
|
—
|
—
|
—
|
—
|
—
|
—
|
—
|
—
|
|
|
Diagram: Solitude Hand Mirror, Ornate
(Solitude Hand Mirror, Ornate)
|
Suite
(Mirrors)
|
—
|
—
|
—
|
—
|
—
|
—
|
—
|
—
|
|
|
Diagram: Solitude Lantern, Hanging
(Solitude Lantern, Hanging)
|
Lighting
(Lanterns)
|
—
|
—
|
—
|
—
|
—
|
—
|
—
|
—
|
|
|
Diagram: Solitude Lantern, Table
(Solitude Lantern, Table)
|
Lighting
(Lanterns)
|
—
|
—
|
—
|
—
|
—
|
—
|
—
|
—
|
|
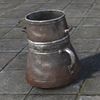
|
Diagram: Solitude Melting Pot, Double Boiler
(Solitude Melting Pot, Double Boiler)
|
Hearth
(Cookware)
|
—
|
—
|
—
|
—
|
—
|
—
|
—
|
—
|
|
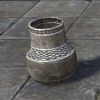
|
Diagram: Solitude Pot, Narrow Metal
(Solitude Pot, Narrow Metal)
|
Hearth
(Pottery)
|
—
|
—
|
—
|
—
|
—
|
—
|
—
|
—
|
|
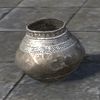
|
Diagram: Solitude Pot, Stout Metal
(Solitude Pot, Stout Metal)
|
Hearth
(Pottery)
|
—
|
—
|
—
|
—
|
—
|
—
|
—
|
—
|
|
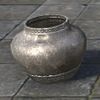
|
Diagram: Solitude Pot, Wide Metal
(Solitude Pot, Wide Metal)
|
Hearth
(Pottery)
|
—
|
—
|
—
|
—
|
—
|
—
|
—
|
—
|
|
|
Diagram: Solitude Sconce, Lantern
(Solitude Sconce, Lantern)
|
Lighting
(Sconces)
|
—
|
—
|
—
|
—
|
—
|
—
|
—
|
—
|
|

|
Diagram: Solitude Sconce, Torch
(Solitude Sconce, Torch)
|
Lighting
(Sconces)
|
—
|
—
|
—
|
—
|
—
|
—
|
—
|
—
|
|
|
Diagram: Solitude Sconce, Wolf's-Head Lantern
(Solitude Sconce, Wolf's-Head Lantern)
|
Lighting
(Sconces)
|
—
|
—
|
—
|
—
|
—
|
—
|
—
|
—
|
|
|
Diagram: Solitude Sconce, Wrought Iron
(Solitude Sconce, Wrought Iron)
|
Lighting
(Sconces)
|
—
|
—
|
—
|
—
|
—
|
—
|
—
|
—
|
|
|
Diagram: Solitude Scraper, Simple
(Solitude Scraper, Simple)
|
Workshop
(Tools)
|
—
|
—
|
—
|
—
|
—
|
—
|
—
|
—
|
|
|
Diagram: Solitude Serving Bowl, Metal
(Solitude Serving Bowl, Metal)
|
Hearth
(Dishes)
|
—
|
—
|
—
|
—
|
—
|
—
|
—
|
—
|
|
|
Diagram: Solitude Serving Dish, Metal
(Solitude Serving Dish, Metal)
|
Hearth
(Dishes)
|
—
|
—
|
—
|
—
|
—
|
—
|
—
|
—
|
|
|
Diagram: Solitude Skewer, Twisted Iron
(Solitude Skewer, Twisted Iron)
|
Workshop
(Tools)
|
—
|
—
|
—
|
—
|
—
|
—
|
—
|
—
|
|
|
Diagram: Solitude Strongbox, Iron Bands
(Solitude Strongbox, Iron Bands)
|
Suite
(Trunks)
|
—
|
—
|
—
|
—
|
—
|
—
|
—
|
—
|
|
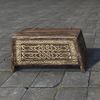
|
Diagram: Solitude Trunk, Knotwork
(Solitude Trunk, Knotwork)
|
Suite
(Trunks)
|
—
|
—
|
—
|
—
|
—
|
—
|
—
|
—
|
|
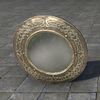
|
Diagram: Solitude Wall Mirror, Ornate
(Solitude Wall Mirror, Ornate)
|
Suite
(Mirrors)
|
—
|
—
|
—
|
—
|
—
|
—
|
—
|
—
|
|
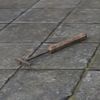
|
Diagram: Solitude Wedge Pick, Simple
(Solitude Wedge Pick, Simple)
|
Workshop
(Tools)
|
—
|
—
|
—
|
—
|
—
|
—
|
—
|
—
|
|
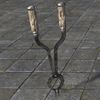
|
Diagram: Tongs, Forge
(Tongs, Forge)
|
Workshop
(Tools)
|
—
|
—
|
—
|
—
|
—
|
—
|
—
|
—
|
|
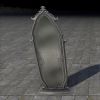
|
Diagram: Vampiric Mirror, Standing
(Vampiric Mirror, Standing)
|
Suite
(Mirrors)
|
—
|
—
|
—
|
—
|
—
|
—
|
—
|
—
|
|
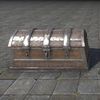
|
Diagram: Vampiric Trunk, Ornate Metal
(Vampiric Trunk, Ornate Metal)
|
Suite
(Trunks)
|
—
|
—
|
—
|
—
|
—
|
—
|
—
|
—
|
|
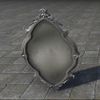
|
Diagram: Vampiric Wall Mirror
(Vampiric Wall Mirror)
|
Suite
(Mirrors)
|
—
|
—
|
—
|
—
|
—
|
—
|
—
|
—
|
|
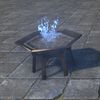
|
Diagram: Velothi Brazier, Temple
(Velothi Brazier, Temple)
|
Lighting
(Braziers)
|
—
|
—
|
—
|
—
|
—
|
—
|
—
|
—
|
|


