Skyrim:Traps
| This page or section is incomplete. You can help by adding to it. The Cause traps For more information, see the help files, the style guide, and this article's talk page. |
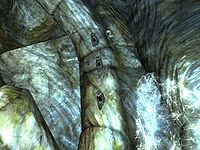
During your travels in Skyrim, you will encounter a variety of traps and physical hazards. Most traps are activated by a specific "trigger", which may be a physical object or an invisible proximity trigger built into the game. Several puzzles are trapped if you fail to solve them correctly. Traps often blend into their environment or may be hidden inside walls or other features, making them difficult to spot and avoid. With experience, most traps can be avoided altogether, or even turned against your enemies.
Contents
- 1 Triggers
- 2 Physical Traps
- 2.1 Battering Ram
- 2.2 Bear Trap
- 2.3 Bone Chimes
- 2.4 Claw
- 2.5 Ceiling Spikes
- 2.6 Chaurus CocoonDG
- 2.7 Crossbow MountDG
- 2.8 Dart Trap
- 2.9 Dwarven Scuttle
- 2.10 Dwemer Ballista
- 2.11 Exploding Spider EggDB
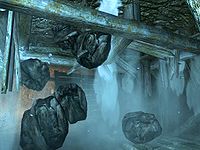
- 2.12 Falling Boulders
- 2.13 Falmer Pod
- 2.14 Gargoyle StatueDG
- 2.15 Infected BonesDG
- 2.16 Rotten Planks
- 2.17 Riekling BarrelDB
- 2.18 Skull Ram
- 2.19 Slicer
- 2.20 Spear Trap
- 2.21 Spike Pit
- 2.22 Spike Wall
- 2.23 Spinning Blades
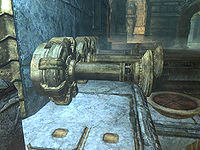
- 2.24 Steam Piston
- 2.25 Swinging Blades
- 2.26 Swinging Mace
- 2.27 TentaclesDB
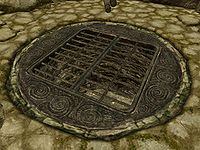
- 2.28 Trap Door
- 3 Magical Traps
- 4 Natural Hazards
Triggers[edit]
Triggers are distinct objects that may activate traps or other devices, such as doors or gates, through direct physical contact or manual activation. Trigger activation is not limited to player characters, which means that followers, NPCs, and sometimes creatures can interact with a trigger device. Some triggers can be activated at a distance by firing an arrow or a Magelight spell at them.
Button[edit]
|
Found in: Dwarven ruins, military forts, and Nordic ruins |
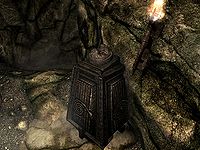
Buttons may open and close doors or gates, or may trigger a nearby trap. They are sometimes used in puzzles (like the one used to activate the Oculory in the Tower of Mzark during Elder Knowledge), where they usually must be activated in a specific order to complete the puzzle. The button closest to a closed door may activate a trap instead of opening the door as expected (in these cases, the correct button is usually located elsewhere in the room or around a corner). Some buttons may be hidden or found locked behind a barrier, which must be unlocked before they can be activated.
Followers can be instructed to activate switches, including buttons.
Handle[edit]
|
Found in: Dwarven ruins, military forts, and Nordic ruins |
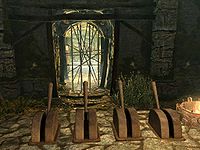
Handles are usually used to open gates or hidden doors, but may also be used to activate or disables traps. Handles may sometimes appear as an element of a puzzle, such as the totem puzzle in Volskygge during its related quest. The handle closest to a closed gate may activate a trap instead of opening the gate as expected (in these cases, the correct button is usually located elsewhere in the room or around a corner), and you may need to activate multiple handles in order to successfully open a gate. Handles may be hidden or found locked behind a barrier, which must be unlocked before they can be activated.
Followers can be instructed to activate switches, including handles.
Lever[edit]
|
Found in: Dwarven ruins, military forts, and Nordic ruins |
Levers are commonly used to open doors, gates, or grates, but may also be used to deactivate a trap. When used as a puzzle element, levers usually must be activated in the correct order to solve the puzzle; activating the levers in the incorrect order may trigger a trap, such as a barrage of darts. You may also be required to throw a lever after solving another puzzle (such as a series of rune totems) in order to open a door, like one found in Bleak Falls Barrow during its related quest. The lever closest to a closed door may activate a trap instead of opening the door as expected (in these cases, the correct lever is usually located elsewhere in the room or around a corner). Some levers may also be hidden or found locked in small wall-mounted cages, which must be unlocked before they can be activated.
Followers can be instructed to activate switches, including levers.
Pressure Plate[edit]
|
Found in: Dwarven ruins, military forts, and Nordic ruins |
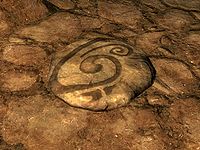
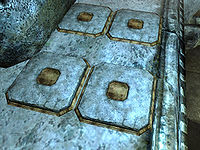
Pressure plates are used to trigger a variety of traps, including battering rams, spike walls, and darts. They are sometimes used as an element in puzzles. Although pressure plates cannot be disarmed, they are most often placed in the center of a hallway or passage, and activation can often be avoided by hugging the walls or simply jumping over the trigger surface. You can also place a heavy object, such as a body, on the plate; the trap will be triggered, but the weight of the object on the plate will prevent the trap from firing again.
The sneak perk Light Foot will allow you to walk and run directly over pressure plates without activating them, even when in werewolf form.
Pull Chain[edit]
|
Found in: Dwarven ruins, military forts, and Nordic ruins |
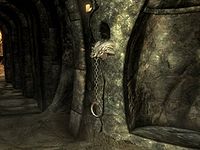
Pull chains are most commonly used to open gates or doors or to disable traps. You may have to activate two or more pull chains in order to open a particular barrier. Pull chains may also be used as an element in puzzles, such as the third test in the Twilight Sepulcher during Darkness Returns. The pull chain closest to a closed door may activate a trap or a different door instead of opening the door you expected (in these cases, the correct button is usually located elsewhere in the room or around a corner). Pull chains can blend into dark dungeon walls, making them difficult to spot. They may also be hidden or found locked behind a barrier, which must be unlocked before they can be activated.
Followers can be instructed to activate switches, including pull chains.
Tension Cable[edit]
|
Found in: Dwarven ruins, military forts, and Nordic ruins |
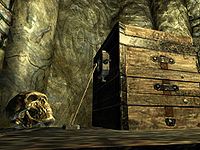
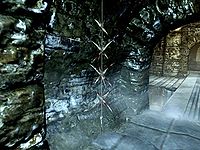
Tension cables are typically attached to locked doors or chests, set to trigger traps such as darts when the container is opened by an unsuspecting adventurer. While the mechanism attached to the cable is sometimes in plain view, it is advisable to check both sides of a container before attempting to open it. If you do not have any lockpicks or choose not to disarm the cable, you can usually avoid any damage by simply by analyzing the trap and dodging it after intentionally triggering it. Arrows or spells aimed at the tension cable can do this from a safe distance—preferably somewhere near a corner, doorway, or solid object you can use for cover from projectile traps.
Tripwire[edit]
|
Found in: Dwarven ruins, military forts, mines, and towers |
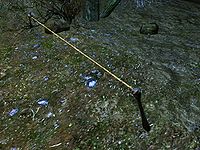
Because tripwires can only work once, they most commonly trigger single use traps like falling rocks, swinging maces, and battering rams. You can avoid the trap by jumping over the cord. You can also break the wire manually with the activate button, or by shooting at the wire with an arrow or spell.
Valve[edit]
|
Found in: Calcelmo's Laboratory and Derelict Pumphouse |
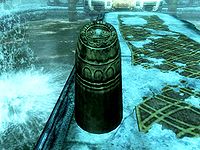
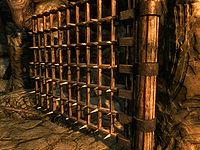
These Dwemer mechanisms utilize steam energy to keep a trap ready until it is needed; when the valve is opened, the steam pressure releases the trap on the unsuspecting victim. Valves can also be used to operate doors or gates.
Weight Sensitive Plate[edit]
|
Found in: Nordic ruins |
You can use the Alteration spell Telekinesis to remove items from weight sensitive plates from a safe distance or angle. Items can also be knocked free with arrows or spells, but may be more difficult to find after they have fallen. The Slow Time shout can also be used to quickly snag the item and run away before the harmful effects of the trap are triggered. It is also possible to switch the object on the plate with an item from your inventory if you wish to avoid activating the trap at all.
Physical Traps[edit]
These traps deal physical damage and may forcibly move the victim on impact. With the right timing, many of these traps can be successfully used against nearby enemies.
Battering Ram[edit]
| Level | Damage |
|---|---|
| 1–10 | 50 |
| 11–15 | 75 |
| 16–20 | 100 |
| 21–25 | 125 |
| 26–30 | 150 |
| 31+ | 175 |
|
Found in: Mines and Nordic ruins |
The majority of battering rams are activated by trigger mechanisms such as pressure plates or tripwires placed in the middle of a passage, and are designed to strike an area slightly ahead of the trigger (intended to catch you as you run past the trigger). Battering rams attached to chains will only deploy once, while those attached to metal frames reset after a few seconds. Watch the floor for possible triggers and the ceiling for any rigged logs in order to avoid this trap. If you accidentally trigger a battering ram, back up quickly to avoid being struck by the heavy log. Since battering rams strike a fairly small area, it is possible to sidestep the ram as you continue moving forward, but this feature also makes it more difficult to use a ram against enemies.
Bear Trap[edit]
| Level | Damage |
|---|---|
| 1–6 | 20 |
| 7–10 | 25 |
| 11–14 | 30 |
| 15–18 | 35 |
| 19–22 | 40 |
| 23+ | 45 |
|
Found in: Dawnstar Sanctuary, The Ratway, Riften Jail, Volkihar UndercroftDG, bandit camps, caves, Forsworn camps, military forts, shipwrecks |
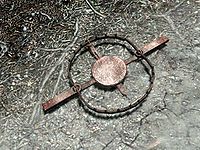
Generally more of a nuisance than a serious threat, bear traps can be disarmed ahead of time by manual activation,. You can also reactivate them to slow enemy pursuit. The Sneak perk Light Foot will allow you to walk and run directly over bear traps without activating them.
There is a very small chance that you will contract Ataxia, Bone Break Fever, Brain Rot, Rattles, Rockjoint, or Witbane from bear traps.
You can also manually move bear traps by dragging them, in order to place them on more tactical locations.
Bone Chimes[edit]
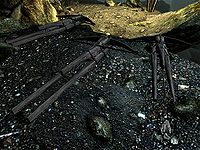
|
Found in: Bandit-occupied mines and Forsworn camps |
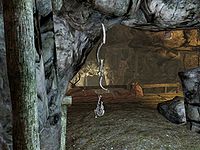
While bone chimes do not cause any physical harm to the player, accidental activation will cause a sound detection event, alerting nearby enemies to your presence and potentially ruining the chance for a sneak attack. The jangling chimes may wake sleeping NPCs or undead.
Claw[edit]
| Level | Damage |
|---|---|
| 1–15 | 80 |
| 16–20 | 125 |
| 21–25 | 150 |
| 26–30 | 175 |
| 31–35 | 200 |
| 36+ | 225 |
|
Found in: Dwarven ruins and Falmer-occupied caves |
Claw traps are often triggered by tripwires, so although they may retract as if to strike again, traps connected to tripwires will not be able to activate a second time. While it is not possible to directly disarm a claw trap, you may be able to disable the mechanism that triggers it. Depending on how they are placed, claw traps can usually be easily spotted and avoided. You may also be able to trigger them remotely (by striking the trigger with an arrow or spell).
There is a very small chance that you will contract Ataxia, Bone Break Fever, Brain Rot, Rattles, Rockjoint, or Witbane from claw traps.
Ceiling Spikes[edit]
| Level | Damage |
|---|---|
| 1–10 | 45 |
| 11–15 | 70 |
| 16–20 | 80 |
| 21–25 | 90 |
| 26–30 | 100 |
| 31+ | 110 |
|
Found in: Ansilvund, Forelhost, Forsaken Crypt, and Rielle CryptCC |
Being slammed into these spikes can cause significant damage, so it is best to scan the floor carefully as you go and avoid any suspect areas. If you find yourself rocketing towards the ceiling, immediately run off the side of the moving platform to avoid the spikes.
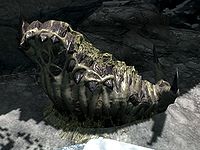
Chaurus CocoonDG[edit]
|
Found in: Blackreach, Chillwind Depths, Darkfall Cave (passage), Forgotten Vale, Frostflow Abyss, Mzulft, Irkngthand, and Tolvald's Cave |
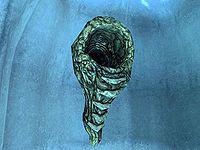
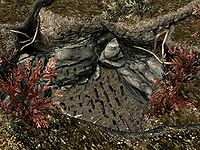
Chaurus cocoons can be found in Falmer-infested locations added by the Dawnguard add-on. They may be inert, or a chaurus may burst forth when you come near them. They can be destroyed by weapons or spells, but may still release their occupant if the first attack does not destroy them.
Crossbow MountDG[edit]
| Level | Damage |
|---|---|
| 1–15 | 10 per bolt |
| 16–20 | 15 per bolt |
| 21–25 | 20 per bolt |
| 26–30 | 25 per bolt |
| 31–35 | 30 per bolt |
| 36+ | 35 per bolt |
|
Found in: Dead Drop Falls and Ruunvald Excavation |
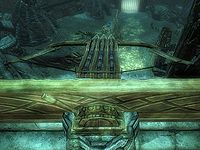
Crossbow traps are added by the Dawnguard add-on. They can be avoided by evading the trigger, and you may be able to disable the trigger or set it off remotely with a spell or arrow. Activate the crossbow mount itself to receive a crossbow; if the trap has not fired, you will receive a bolt as well. If you activate the mount again, you will re-insert the crossbow, load a bolt from your inventory, and reset the trap.
Dart Trap[edit]
| Level | Generic | Dwemer |
|---|---|---|
| 1–10 | 1 per dart | 2 per dart |
| 11–15 | 1 per dart | 2 per dart |
| 16–20 | 1 per dart | 3 per dart |
| 21–25 | 2 per dart | 3 per dart |
| 26–30 | 2 per dart | 4 per dart |
| 31+ | 3 per dart | 5 per dart |
|
Found in: Dwarven and Nordic ruins |
One of the most common traps encountered in ruins, dart traps have a wide variety of triggers, including pressure plates, levers, and tripwires. If the trigger that activates the darts can be disabled (like a tripwire), disabling the trigger will disarm the darts. As with other traps, you may also be able to set off the trap remotely with a spell or arrow. If you have been caught in a dart trap, it is best to move quickly out of firing range, as the combined damage of multiple darts and their poison or disease effects can be quite deadly.
Dwarven Scuttle[edit]
|
Found in: Dwarven ruins |
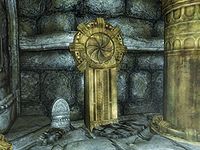
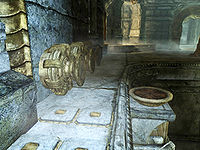
Dwarven scuttles are a common element in Dwarven ruins. Most are inert, but a few will release an automaton when approached. There is no visible trigger for them, and sneaking will not prevent them from opening. The Aura Whisper shout will help you detect the automaton while it is still in the scuttle.
Dwemer Ballista[edit]
|
Found in: Blackreach, Irkngthand, and Raldbthar |
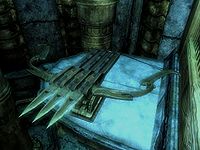
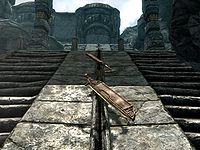
One of the deadliest devices in Skyrim, Dwemer ballistae are usually found as one-time-use launchers in Dwarven ruins, activated by a nearby lever. The only reported instance of this item being used as a trap is within the depths of Raldbthar. It is triggered by a pressure plate across from the ballista at the top of a flight of stairs. It can be avoided by simply running over the trigger and down the stairs, causing the missiles to pass harmlessly overhead.
Exploding Spider EggDB[edit]
|
Found in: Highpoint Tower and White Ridge Barrow |
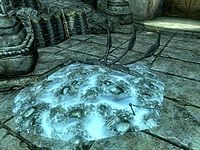
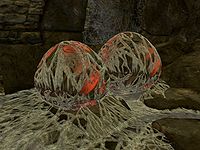
Found only in Solstheim, these curious egg sacs contain magical flame and frost spiders. The glow of the egg corresponds to the particular type of spider inside (red for fire and icy blue for frost). The eggs can be triggered from a distance if struck by a missile or spell, and you can avoid them altogether if you have sufficient Sneak skill.
Although poison and shock spider egg traps exist in the game data, they are only ever used in a test cell and do not appear in-game.
Falling Boulders[edit]
| Level | Small | Large |
|---|---|---|
| 1–6 | 10 | 20 |
| 7–10 | 16 | 26 |
| 11–14 | 15 | 30 |
| 15–18 | 18 | 36 |
| 19–22 | 22 | 44 |
| 23+ | 25 | 50 |
|
Found in: bandit camps, caves, Dwarven ruins, Forsworn camps, military forts, mines, and Nordic ruins |
Falling boulders are most frequently triggered by tripwires, although some (such as the boulder traps at Robber's Gorge) are triggered by levers or other switches.
Falmer Pod[edit]
|
Found in: Falmer-occupied caves |
Falmer pods are a common element wherever Falmer enemies are found, including some Dwarven ruins. Most are inert, but some house lurking Falmer that will emerge when the pod is approached. Sneaking will not prevent the Falmer from exiting the pod. A Detect Life spell or the Aura Whisper shout will help you detect the Falmer while it is still in the pod.
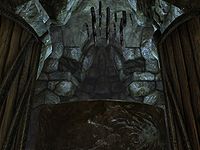
Gargoyle StatueDG[edit]
|
Found in: Bloodlet Throne, Castle Volkihar Undercroft, and Dimhollow Crypt |
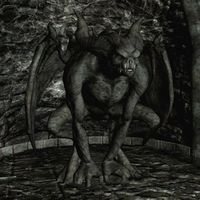
Gargoyle statues are typically used as a decorative element in certain areas and are seen in groups (with one flanking each side of a room, for example); usually, only one or two of the statues in a particular area are actually gargoyles. You may be able to distinguish disguised gargoyles from ordinary statues with the use of spells such as Detect Life or Soul Trap. Gargoyles in statue form are immune to damage and cannot be attacked until they have transformed.
Infected BonesDG[edit]
| Level | Damage |
|---|---|
| 1–20 | 15 |
| 21–25 | 20 |
| 26–30 | 25 |
| 31–35 | 30 |
| 36–40 | 35 |
| 41+ | 40 |
|
Found in: Castle Volkihar Undercroft |
Like bone chimes, strings of infected bones are used as alarms to alert nearby enemies of your presence. The noise caused by coming into contact with the bones may ruin your attempts to sneak past enemies, or may wake sleeping NPCs. Since this particular alarm also inflicts damage, it is best to walk carefully around them whenever possible.
Infected bones are particularly nasty traps when it comes to disease, and have a fairly high chance of infecting you with Ataxia, Bone Break Fever, Brain Rot, Rattles, Rockjoint, Sanguinare Vampiris, or Witbane.
Rotten Planks[edit]
|
Found in: Mines |
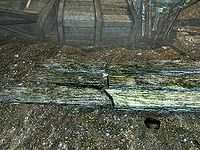
You may be able to tell a rotted plank from a solid one by checking any wood planks on the floor for cracks. If you see a crack in the plank, it is probably best to go around that area, or jump over it if possible.
Riekling BarrelDB[edit]
|
Found in: Riekling-occupied areas in Solstheim |
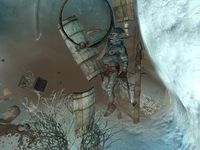
Barrels containing Rieklings look identical to ordinary barrels, so be on your guard when looting barrels in any areas that are inhabited by Rieklings. However, Detect Life shows the Riekling below the barrel in the ground.
Skull Ram[edit]
| Level | Damage |
|---|---|
| 1–6 | 75 |
| 11–10 | 100 |
| 16–15 | 125 |
| 21–18 | 150 |
| 26–22 | 175 |
| 23+ | 200 |
|
Found in: Mines and ruins |
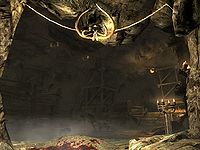
Like battering rams, skull rams are activated by trigger mechanisms such as pressure plates or tripwires placed in the middle of a passage. The mammoth skulls used in these traps are far more deadly than the logs used for battering rams, even at low levels, and the impact of the swinging skull can throw you a huge distance backward. Watch the floor for possible triggers and the ceiling for any looming skulls in order to avoid this trap. If you accidentally trigger a skull ram, retreat immediately to avoid its massive tusks. Skull rams sweep over a much wider area than ordinary battering rams, and can be used against your enemies with devastating effect.
Slicer[edit]
| Level | Damage |
|---|---|
| 1–25 | 100 |
| 26–30 | 175 |
| 31–35 | 200 |
| 36–40 | 225 |
| 41–45 | 250 |
| 46+ | 275 |
|
Found in: Markarth Wizard's Quarters, Dwarven ruins |
The Dwemer slicer operates like the spike wall and the claw trap; depending where it is placed, it will swing toward you from the side of a wall or down from the ceiling, and is often triggered by pressure plates and tripwires. You cannot disable the slicer directly, but you may be able to disable or avoid the mechanism that triggers it. These traps are some of the most deadly found in Skyrim, so it is best to avoid triggering them at all, or get quickly out of the way if you (or your follower or another creature) happen to set it off. Many enemies will not be able to move quickly enough to avoid the sweeping blades once they have been activating, so it is fairly easy to use these against hostile NPCs or other creatures.
Spear Trap[edit]
| Generic | Falmer | Dwemer | |||
|---|---|---|---|---|---|
| Level | Damage | Level | Damage | Level | Damage |
| 1–6 | 10 | 1–15 | 4 | 1–25 | 20 |
| 7–10 | 14 | 16–20 | 7 | 26–30 | 26 |
| 11–14 | 17 | 21–25 | 20 | 31–35 | 30 |
| 15–18 | 20 | 26–30 | 23 | 36–40 | 33 |
| 19–22 | 23 | 31–35 | 26 | 41–45 | 36 |
| 23+ | 26 | 36+ | 30 | 46+ | 39 |
|
Found in: Nchuand-Zel, Dwarven and Nordic ruins |
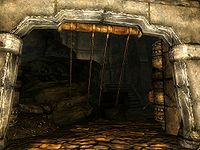
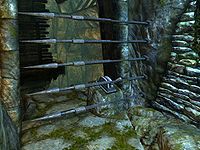
Spear traps are commonly located near trapped chests or doors and are often triggered by a tension cable. Some may also be rigged to pressure plates or other trapped switches. When you hear a spear trap spring into action, you should make a point of quickly getting out of the way, as they can cause significant damage.
Ceiling-mounted variants are found in some Dwarven ruins, and are easily spotted by the presence of pressure plates. Generic spike traps have a hexagonal hole, while Dwarven spike traps are more rectangular. The Dwemer variety of spear does the most damage, while the Falmer variety has a very small chance to infect you with Ataxia, Bone Break Fever, Brain Rot, Rattles, Rockjoint, or Witbane.
Spike Pit[edit]
| Level | Damage |
|---|---|
| 1–6 | 40 |
| 7–10 | 60 |
| 11–14 | 70 |
| 15–18 | 80 |
| 19–22 | 90 |
| 23+ | 100 |
|
Found in: Halted Stream Camp, Orphan Rock, Pinewatch, military forts, Nordic ruins |
When progressing through wilderness areas, keep an eye out for any sudden changes in terrain, which may indicate the presence of pits. If you fall into a pit, escape as carefully as possible, as you may take more damage from the spikes if you bump into them while trying to jump out.
Spike Wall[edit]
| Level | Damage |
|---|---|
| 1–10 | 75 |
| 11–15 | 100 |
| 16–20 | 125 |
| 21–25 | 150 |
| 26–30 | 175 |
| 31+ | 200 |
|
Found in: Temple of Miraak, caves, military forts, Nordic ruins |
Spike walls are usually triggered by pressure plates located in the center of a hallway, so keeping a lookout for plates and hugging the walls in dungeons will help you avoid the majority of these traps. The Light Foot perk will allow you to avoid setting off any spike walls that are triggered by pressure plates. Spike walls found on high, narrow paths are particularly dangerous, as the force of the blow can knock you off the walkway.
The high damage and knockback of spike walls can make them useful against enemies lured into the area of effect. Use caution with followers, as it can be difficult to get them to successfully follow you around the trigger.
There is a very small chance that you will contract Ataxia, Bone Break Fever, Brain Rot, Rattles, Rockjoint, or Witbane from spike wall traps.
Spinning Blades[edit]
| Level | Damage |
|---|---|
| 1–3 | 40 |
| 4–6 | 60 |
| 7–10 | 100 |
| 11–15 | 130 |
| 16–20 | 160 |
| 21+ | 190 |
|
Found in: Blackreach, Understone Keep, and Dwarven ruins |
Spinning blades are one of the deadliest traps in the game, capable of quickly killing anything that comes too close. The trap can be activated by a variety of triggers, and in some instances merely passing by will set it off. If you spot the blades' track before the trap activates, stay well away from it. As soon as you hear or see the blades moving, get clear of their reach as quickly as possible to avoid damage.
There is a very small chance that you will contract Ataxia, Bone Break Fever, Brain Rot, Rattles, Rockjoint, or Witbane from spinning blade traps.
Steam Piston[edit]
|
Found in: Dwarven ruins |
You will encounter several steam pistons in Dwarven ruins that are constantly active, while some are activated by triggers, such as a pressure plate. Pistons are often set on narrow ledges and will push you off the ledge or into another trap if you do not avoid them. The pistons block movement while extended. In a few cases, steam pistons will extend upward from the floor and can be used to reach higher ledges.
Swinging Blades[edit]
| Level | Damage |
|---|---|
| 1–10 | 30 |
| 11–15 | 40 |
| 16–20 | 50 |
| 21–25 | 60 |
| 26–30 | 70 |
| 31+ | 80 |
|
Found in: Caves, Nordic ruins |
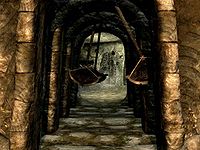
Swinging blades can be avoided by sprinting or using the Whirlwind Sprint shout. You can also pass one blade at a time, stopping in the gap between blades before moving past the next one. This can be difficult, however, as the space between blades is fairly narrow. You can also avoid damage by using the Become Ethereal shout and walking through.
There is a very small chance that you will contract Ataxia, Bone Break Fever, Brain Rot, Rattles, Rockjoint, or Witbane from swinging blade traps.
Swinging Mace[edit]
| Level | Damage |
|---|---|
| 1–3 | 40 |
| 4–6 | 50 |
| 7–10 | 60 |
| 11–15 | 70 |
| 16–20 | 80 |
| 21+ | 90 |
|
Found in: Bandit-occupied caves |
Swinging mace traps are usually triggered by tripwires. Like any trap rigged to a wire, it will not be activated if the tripwire is disarmed first, and you can activate the trap from a safe distance using an arrow or a spell. You can avoid a descending mace by quickly running backwards or by moving off to the side as it swings by.
TentaclesDB[edit]
| Level | Damage |
|---|---|
| 1–30 | 100 |
| 31–38 | 150 |
| 39–46 | 200 |
| 47–54 | 250 |
| 55–62 | 300 |
| 63+ | 350 |
|
Found in: Apocrypha |
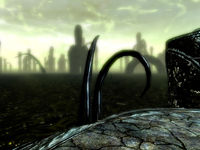
Tentacle traps are only found in Apocrypha, Hermaeus Mora's plane of Oblivion. Their whip attacks can deal a hefty blow to the unwary.
There is a very small chance that you will contract Ataxia, Bone Break Fever, Brain Rot, Rattles, Rockjoint, or Witbane from tentacle traps.
Trap Door[edit]
|
Found in: Rannveig's Fast, Shroud Hearth Barrow, Valthume |
Trap doors cannot be disarmed directly, but it is possible to avoid the trigger. Some trap doors are operated manually via a pull chain or other switch. If you fall through the doors, you will have to find your way through the dungeon back to the room with the trap. You may be able to move off of the trap door and avoid falling if you react quickly enough.
Magical Traps[edit]
These traps take on a variety of forms, but they all cause elemental or magical damage. The effects of magical traps can be resisted through racial powers, enchantments, and alchemy potions.
DarknessDB[edit]
|
Found in: Apocrypha (Filament and Filigree and The Sallow Regent) |
These areas of damaging darkness are found only in sections of Apocrypha that are accessed by reading the Black Books Filament and Filigree and The Sallow Regent.
As you move through the darkness, if your location has 30% light or less, the trap will deal 1% of your total current health per second. If the area is brighter, the darkness will not damage you. The damage from this effect is scripted and cannot be resisted by any means (including the Become Ethereal shout). You can, however, use light effects (such as Candlelight, Magelight, and torches) to surround yourself in light and avoid the darkness effect.
Even the use of God Mode will not stop the damage from the darkness.
Elemental Rune[edit]
| Level | Effect |
|---|---|
| 1–9 | Fire, frost, or shock damage, 45 pts for 3 seconds |
| 10–14 | Fire, frost, or shock damage, 80 pts for 3 seconds |
| 15–19 | Fire, frost, or shock damage, 90 pts for 3 seconds |
| 20–24 | Fire, frost, or shock damage, 100 pts for 3 seconds |
| 25–29 | Fire, frost, or shock damage, 110 pts for 3 seconds |
| 30+ | Fire, frost, or shock damage, 120 pts for 3 seconds |
|
Found in: Dragon lairs, military forts, and Nordic ruins |
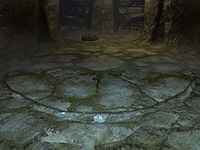
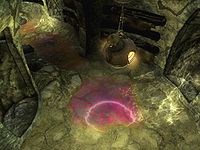
The damage caused by runes can be deadly, depending on your level and any resistances or enchantments you may have, so it is best to steer clear of them whenever possible. Elemental runes can be triggered from a safe distance using a spell, shout, or arrow. You can also use the Whirlwind Sprint shout to run past the rune without taking damage from the blast.
Flame Spout Trap[edit]
| Level | Effect |
|---|---|
| 1–10 | Fire damage, 13 pts for 3 seconds |
| 11–15 | Fire damage, 16 pts for 3 seconds |
| 16–20 | Fire damage, 19 pts for 3 seconds |
| 21–25 | Fire damage, 21 pts for 3 seconds |
| 26–30 | Fire damage, 26 pts for 3 seconds |
| 31+ | Fire damage, 30 pts for 3 seconds |
|
Found in: Ansilvund, Riftweald Manor, Silverdrift Lair, and Ustengrav |
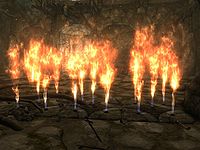
These traps usually appear in a large number, covering the majority of a room or passageway. An arrow fired at one of the tiles provides enough force to trigger the trap, and placing an object (such as a corpse) on a tile will cause the trap to fire continuously. The Sneak perk Light Foot will allow you to walk and run directly over flame spout traps without activating them. Using Whirlwind Sprint to pass over the tiles will trigger them, but the burst of speed is fast enough evade the resulting flames.
If the center of an individual plate lacks a dark diamond in the center, it will not shoot flames, even when stepped on.
Flamethrower Statues[edit]
|
Found in: Dwarven and Nordic ruins |
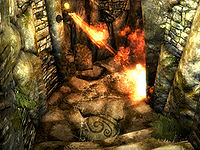
Flamethrower statues are usually triggered by a switch, such as a pressure plate. The flamethrowers cannot be disabled directly, but avoiding or disabling their associated triggers will prevent them from firing. If you accidentally activate a flamethrower trap, rush quickly out of the path of the flames to avoid taking damage.
Flammable Gas[edit]
|
Found in: Alftand, Gloombound Mine, Knifepoint Mine, Raven Rock Mine, and Stony Creek Cave |
Flammable gases are only found in a few places, but can be quite dangerous. Any ignition source, such as a lit torch, Fire Breath shout, or even having a flame spell at the ready will ignite the vapors, causing significant damage to everyone caught in its area of effect. The resulting explosion will also alert nearby enemies. After exploding, the gas will take some time to build up to explosive levels again.
Be very careful if you have a follower who is carrying a torch or likes to use fire spells. Setting off a gas explosion can cause your follower to become hostile to you if they are damaged by the fire, or can cause two followers to become hostile to each other if one of them sets it off and damages the other.
Ideal Master CrystalDG[edit]
|
Found in: Soul CairnDG |
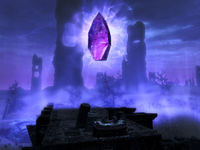
Ideal Master Crystals are large, floating crystals found in various locations within the Soul Cairn. When you pass within range of the crystal, its magic will drain 10 pts of health per second until you are at or below 25% of your maximum health. It will also damage health regeneration by 100%. The effects of the crystal's drain can be avoided by eating soul husks or drinking soul husk extract. If your health regeneration is higher than 100%, you will still regenerate health (although much more slowly) while under this effect.
Light[edit]
|
Found in: Twilight Sepulcher |
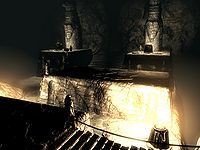
Light traps are found only in the Twilight Sepulcher. The damage from the light is scripted, so there is no way to resist it (not even with the Become Ethereal shout). The light can cause significant damage regardless of your level—20% of your base health per second at max damage, or 5% if not—and is also affected by game difficulty, so be especially cautious if you are playing at higher difficulties. It is best to simply avoid the light in this area as much as possible.
Oil Slicks/Oil Lanterns[edit]
|
Found in: Camps, caves, military forts, mines, Nordic ruins, Dwarven ruins |
Oil slicks and lanterns can be lit by a fire spell or Fire Breath shout, or by dropping a lit torch into the oil. Shooting the lanterns hanging over the oil will drop the lantern into the puddle and ignite it. These traps can also be triggered by enemies or even ignited by a secondary trap mechanism (such as a tripwire) that drops a lantern from the ceiling.
Note that the fiery trail left by flame atronachs will not ignite oil slicks, though the atronachs may still set them off inadvertently with their spells or by setting off trap mechanisms.
Poison BloomDG[edit]
| Level | Effect |
|---|---|
| 1–10 | Poison damage, 5 pts for 6 seconds |
| 21–15 | Poison damage, 7 pts for 6 seconds |
| 26–20 | Poison damage, 9 pts for 6 seconds |
| 31–25 | Poison damage, 11 pts for 6 seconds |
| 36–30 | Poison damage, 13 pts for 6 seconds |
| 31+ | Poison damage, 15 pts for 6 seconds |
|
Found in: Darkfall Passage in the Forgotten Vale DG |
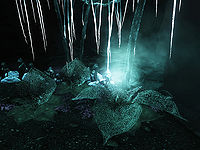
Poison bloom plants are somewhat abundant in Darkfall Passage. Their large size and distinctive appearance make them fairly easy to spot, and you can avoid the poison gas they emit by simply keeping your distance from the plants. Although each individual plant may not be particularly deadly, the combined effect of the gas from a cluster of several flowers can drain your health very rapidly, so approach them with caution.
If you intend to harvest the poison bloom ingredient, you can either quickly approach the plant and harvest it before it fully opens, or trigger its bloom then back off, waiting until the poison gas has dissipated before collecting the ingredient.
Poison Gas[edit]
| Level | Effect |
|---|---|
| 1–10 | Poison damage, 15 pts for 3 seconds |
| 11–15 | Poison damage, 20 pts for 3 seconds |
| 16–20 | Poison damage, 25 pts for 3 seconds |
| 21–25 | Poison damage, 30 pts for 3 seconds |
| 26–30 | Poison damage, 35 pts for 3 seconds |
| 31+ | Poison damage, 40 pts for 3 seconds |
|
Found in: Calcelmo's Laboratory |
This trap is found in Calcelmo's Laboratory. Standing in poison gas causes poison damage over time. Fortunately, there are vents located along the gas-filled passage, which are activated by their corresponding pressure plates. You can also use Clear Skies to dispel the gas.
Poison gas can also be encountered in the Spring's Symphony section of Runoff CavernsCC.[verification needed]
Spellcaster Trap[edit]
|
||||||||||||||||||||||||||||||||
|
||||||||||||||||||||||||||||||||
|
||||||||||||||||||||||||||||||||
|
Found in: Labyrinthian, Potema's Catacombs, caves, Nordic ruins and towers |
The simplest way to disable these traps is to quickly run up and grab the soul gem; grabbing it from behind is a better way to avoid damage, but is not always possible depending on how the trap is placed. It is possible to knock the soul gem out of its stand from a range using a spell, shout, or well-placed arrow, but the trap may not always be disabled if the gem is only knocked askew. The Telekinesis spell is very handy for dealing with these traps, you can use it to lift the soul gem completely off its stand.[verification needed — see talk page] It is also possible for one of these traps to dislodge its own soul gem.
Natural Hazards[edit]
The traps in this section are part of the natural environment in Skyrim, and may be specific to certain locations. These dangers can often be avoided, and you may be able to reduce the damage taken from encountering them with racial abilities, enchantments, or potions.
Fire[edit]
| Level | Effect |
|---|---|
| 1–15 | Flames, 10 pts per second |
| 16–20 | Flames, 15 pts per second |
| 21–25 | Flames, 20 pts per second |
| 26–30 | Flames, 25 pts per second |
| 31–35 | Flames, 30 pts per second |
| 36+ | Flames, 35 pts per second |
|
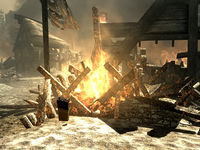
Found in: Helgen (during Unbound), Sunderstone Gorge, Western Watchtower (during Dragon Rising) |
This trap is generally easy to spot, as it usually occurs in expected locations (the building will be visibly destroyed and forges are easily recognizable, and fires give off a good amount of light)
Freezing WaterCC[edit]
|
Found in: Northern Skyrim, Winter's Chimes section of Runoff CavernsCC |
The rate at which you become cold depends on various factors including your race. Can be temporarily negated with a Flame Cloak spell.
LavaDG[edit]
|
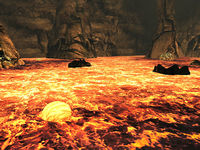
Found in: The Aetherium Forge inside the Ruins of BthalftDG, DeadlandsCC |
Lava can be found in the area surrounding the Aetherium Forge. Coming into contact with lava is dangerous; the moment you touch it, you will receive 150 pts of fire damage, and will be burned by an additional 15 pts of fire damage per second for four seconds.
Lava is also encountered in the Summer's Chords section of Runoff CavernsCC.
LightningDG[edit]
|
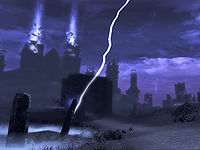
Found in: Soul Cairn |
Random lightning strikes frequently occur while in the Soul Cairn. Generally, these are harmless unless they happen to strike you directly.
Constant lightning strikes are encountered within Runoff CavernsCC prior to completing the related quest and can be a bit more dangerous due to the enclosed indoor spaces.
River Rapids[edit]
|
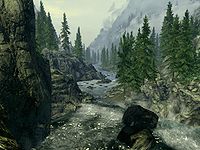
Found in: Rivers |
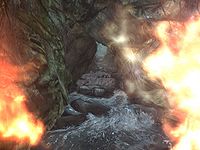
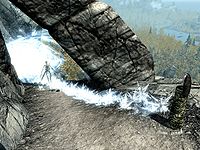
Rapids do not damage you directly and are generally harmless, though it can make it difficult to find a slope to get back onto the shore. If you become swept up in rapids, you risk being washed over waterfalls, which may prove harmful or fatal depending on the height of the falls. One is necessary to discover the Forgotten Vale, and the Vale uses many of these rapids for transportation between areas.
Wind[edit]
|
Found in: The slopes between High Hrothgar and the Throat of the World |
Although Clear Skies will clear a path for you through the wind, it will return after a few seconds, so you'll need to move quickly and shout multiple times to traverse the path to the top of the mountain. It is possible to climb around the areas blocked by wind, but this can be difficult, and falling off the mountain could result in instant death. Even with a high level of frost resistance, the magical wind can kill you quickly.
