Skyrim:Frossel
|
|||
|---|---|---|---|
| # of Zones | 1 | ||
| Clearable | Yes | ||
| Dungeon | Yes | ||
| Respawn Time | Never (storage is safe) | ||
| Level | Min: 6 | ||
| Occupants | |||
| Bristlebacks, Rieklings | |||
| Console Location Code(s) | |||
| DLC2Frossel01, DLC2FrosselExterior00, DLC2FrosselExterior01 | |||
| Region | |||
| Solstheim | |||
| Location | |||
| East of Haknir's Shoal North of Skaal Village |
|||
| Ore Veins | |||
| # of Gold | 5 | ||
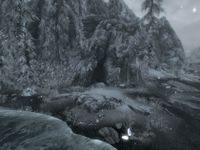
Frossel is a small cave on a peninsula east of Haknir's Shoal and north of Skaal Village containing bristlebacks and rieklings. It contains only one zone, Frossel.
Related Quests[edit]
- Pain in the Necklace: Find East Empire pendants for Fethis Alor.
Walkthrough[edit]
Exterior[edit]
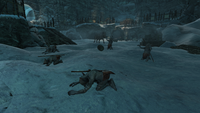
There are eight spiky grass plants producing ashen grass pods, a nirnroot plant, and three pearl oysters on the shore around the entrance. There is also a small coin purse to the right of the entrance next to a crate. Just south of the entrance are two dead reavers on the shore, among the remains of a camp with a boat, a gold ore vein, and a few riekling spears scattered about.
Frossel[edit]
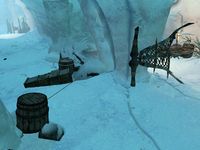
Frossel begins as an ice tunnel descending to the east. On the left side of the tunnel as you descend is a crate with a deer pelt and a rock warbler egg on top. Near the bottom is an ice pillar in the middle of the tunnel, with a leather strip on a crate beside it. When the tunnel turns to the south, look to the corner for a barrel with a piece of iron ore on top. There are many cups, goblets, plates, jugs, and other crockery and clutter throughout the cave.
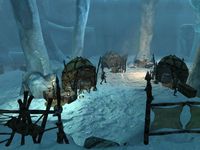
The tunnel opens into a chamber with four rieklings and two bristlebacks. A small fenced ledge in front of you holds a piece of refined moonstone and a deer pelt. The path down is to the left. On the left as you reach the cavern floor are two barrels; one is a fish barrel, and each has a sample of hawk feathers on top. Beneath the ledge via which you entered the chamber, among some riekling tents, crates, sacks, and barrels, there is a leg of goat, a pair of fine boots, a gourd, two chicken breasts, a set of small antlers, a pair of iron gauntlets, four iron ingots (see bugs), three samples of fly amanita, a riekling hut, and two barrels containing ingredients.
To the right of the riekling hut is an unlocked strongbox, a sample of wheat, a thistle branch, a drum, an empty common soul gem, and a piece of moonstone ore all on what appears to be an archery target laid on a rock, with a piece of firewood on the ground in front. The chamber continues to the east. To the left of a bristleback pen is an ice pillar, with two unusable barrels beside it. On these barrels is a bottle of wine and a plate with a rare beehive husk on top. To the right of the pen is another tent with a deer pelt, two iron ingots, a bulb of garlic (see bugs), and a leek.
A tunnel exits to the east. Along the tunnel are five bottles of wine, including one inside a bucket. On the right just before a corner is another unlocked strongbox on a rock. Farther along are more crates and barrels; among these, you will find a drum, a piece of firewood, three pieces of charcoal, a pickaxe, and a silver ingot.
A tripwire at the bottom of the tunnel triggers a hinged claw trap. To the left is an unlocked chest flanked by two riekling barrels, which will burst open to reveal two rieklings. A set of small antlers and a cup will get scattered when the barrels burst. Behind the chest is a fish barrel, and to the right, a knapsack lies on top of another, empty chest. In the easternmost section of this chamber is a tent, with another riekling ready to ambush you from beneath the snow in front of the tent. Inside the tent, among unusable barrels and crates is a large coin purse and a leveled potion. To the right of the tent, on a crate is a quicksilver ore and a chicken's egg in a wooden bowl. To the right on another crate is a random spell tome,† and on the ground is an expert-locked East Empire Company strongbox.
Opposite the two riekling barrels to the south is an empty chest to the left of a gold ore vein. To the right of the vein is a tent with crates and an unusable barrel inside. On the barrel is a rabbit that can be harvested, and on a crate is an iron dagger and three loose septims. Opposite the tripwire to the south is a riekling hut, with a barrel containing ingredients beside it. The tunnel continues to the west, past an empty chest. After another riekling barrel ambush next to a barrel of meat, the tunnel turns to the south. There are two rieklings in the small, narrow chamber ahead. A large coin purse is on a rock to the right. In a short alcove on the left, there's a riekling barrel in front of an unlocked chest. The unique Imperial war horn is found here, along with a red apple, a random shield, and seven loose septims.
At the next corner, there is a woodcutter's axe on the ground (see bugs) and a pair of random gauntlets in an open crate. Farther along are two bowls on a crate next to a food barrel; one bowl holds four small pearls, and the other holds a Nordic barnacle and a pearl. On top of the barrel is a sample of slaughterfish scales, as well as two slaughterfish eggs in another bowl. The tunnel then opens to the main chamber of the cave.
In the main chamber is a curious sight: a group of seven rieklings worshipping a strange idol. A mounted riekling observes from the side. Following the ledge along the eastern wall to the right, you will come upon a riekling hut and a sample of wheat in an adjacent tent. To the left at the entrance is a ramp down to the cavern floor. Any sounds of fighting may draw two more rieklings from a passage beyond. Under the ledge in the northwest section of the chamber is a boss chest near many crates, barrels, and sacks, among which are a total of sixteen loose septims, five silver ingots, two garnets, a silver garnet ring, two silver rings, four small coin purses, three silver necklaces, a gold ring, two gold necklaces, a corundum ingot, a pair of fine boots, a pair of fine shoes, two sets of fine clothes, two fish barrels, a random enchanted weapon, a fine hat, a candlestick, two empty, open chests, a gold ingot, a Dibella statue, and four barrels containing ingredients.
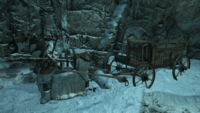
To the southeast, past a tent that contains nothing of interest, is an open pen with a mead barrel in the corner against the ledge, with three bottles of ale, a woodcutter's axe, a random shield, and a ruby lying on the ground near it. To the southwest, between the pen and a gold ore vein and on top of some barrels, there is a broken cart holding five pieces of firewood, a gourd, and a cabbage. Northwest of the cart is a ramp leading up to the ledge with the strange idol on top, and to the left of the ramp is another cart containing three pieces of iron ore and a leather strip. To the right of the gold ore vein is a pickaxe on a barrel, and farther to the right is a tent containing clutter. Continuing along the wall to the right, there is a barrel with a gourd and two raw rabbit legs on top, and farther along another stack of crates with several sacks and more clutter among them.
To the left of where the rieklings are worshipping is a flat-topped rock with several crates and barrels around it. There is a deer pelt, an empty soul gem, and a leather strip here, while on top of the rock is a lute in a basket. In the western corner of the main chamber, near the top of the ramp leading up to the strange idol, there is a steel ingot on a barrel.
An icy tunnel exits the main chamber from the ledge to the north. A short way up the tunnel is a chicken's egg in a wooden bowl on the ground, with a fish barrel and a crate on your left, followed by a gold ore vein on the west wall. The path ascends to a switchback, then up to a second switchback, where a wooden block holds an iron dagger, a bulb of garlic, two samples of slaughterfish scales, and a slaughterfish egg. On the west wall here is another gold ore vein. Continuing up the path, you will pass some barrels and crates with a snow fox pelt and a cabbage on top, plus three random potions in an open box. The path continues to the top, where there is a bowl containing a leek, with a piece of corundum ore and a couple cheese wheels beside it. There is an ice tunnel heading to the southeast, with a bowl on the ground containing a red apple, and farther along another goat cheese wheel and a cast iron pot with a pine thrush egg inside. The tunnel ends at a ledge above the first chamber near the exit. To the left on the ledge before you drop down is a drum and a deer pelt.
Notes[edit]
- Under the ramp leading up to the alcove overlooking the first chamber of the cave is a unique glazed urn which cannot be picked up. However, a jug with a similar appearance can be found in the middle of the chamber.
- This location also appeared in the Bloodmoon expansion for Morrowind.
Bugs[edit]
- There are several items that you may not be able to interact with.
The Unofficial Dragonborn Patch, version 2.0.2, fixes this bug.
